
Desserts
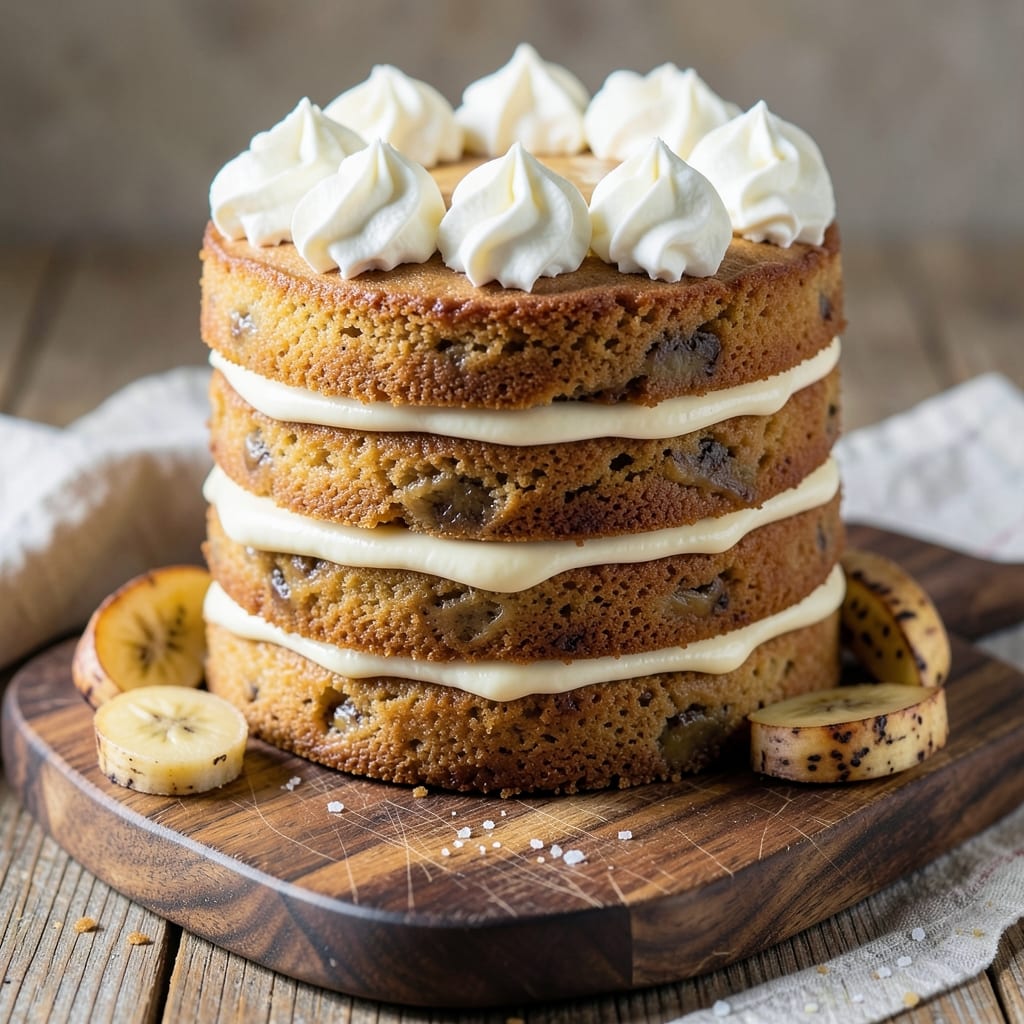
This 3 layer banana cake recipe delivers the kind of dramatic height and velvety texture that makes any celebration feel special. 💛 The secret lies in perfectly balanced layers—moist, tender cake infused with ripe bananas, separated by rivers of luscious vanilla buttercream that hold each tier together. I've baked this exact version for birthdays, holidays, and spontaneous dessert cravings, and it never disappoints.
The real magic happens in the technique: baking each layer just until a toothpick comes out clean (about 25-30 minutes at 350°F) ensures they stay moist, while the buttercream—not just frosting—creates structural integrity for stacking. This isn't your average banana cake; it's a showstopper with professional-level presentation and home-baker simplicity.
What you'll end up with is a cake so tall it requires a sturdy plate, with each forkful offering the perfect balance of banana sweetness and rich buttercream. The texture is moist yet sturdy, never dry or crumbly, and the rivers of frosting between layers create that restaurant-quality look. Perfect for feeding a crowd or treating yourself to something extraordinary.
Whether you're a seasoned baker or just starting out, this recipe builds confidence with clear steps and foolproof techniques. The ingredients list is straightforward (just 10 staples), and I'll walk you through every stage—baking, cooling, assembling, and decorating—to ensure your cake turns out exactly as pictured. Let's get started!
Ingredients for 3 layer banana cake
Ten staples transform into a showstopping cake with dramatic height and velvety texture.
| Ingredient | Amount | Notes |
|---|---|---|
| Ripe Bananas 🍌 | 3 cups | Mashed, about 3 large bananas |
| All-Purpose Flour 🌾 | 3 cups | Sifted, plus extra for pans |
| Granulated Sugar 🍚 | 2 ½ cups | Divided for cake and buttercream |
| Unsalted Butter 🧈 | 1 ½ cups | Room temperature, full-fat preferred |
| Large Eggs 🥚 | 4 whole | Room temperature, separated |
| Pure Vanilla Extract 🌸 | 2 tsp | Or 1 tbsp vanilla paste |
| Baking Soda 🧂 | 1 tsp | Not baking powder |
| Salt 🧂 | ½ tsp | Fine sea salt preferred |
| Whole Milk 🥛 | 1 cup | Room temperature |
| Powdered Sugar 🍚 | 4 cups | For buttercream, sifted |
| Heavy Whipping Cream 🥛 | 1 ½ cups | Cold, full-fat for best texture |
| Vanilla Bean Paste 🌸 | 1 tbsp | Or 1 tsp vanilla extract |
The bananas are non-negotiable here—ripe with brown spots gives the sweetest, most flavorful cake. Trader Joe's or Whole Foods usually have perfectly ripe ones, but check your local market's produce section first. For the butter, Plugrá or Land O'Lakes are reliable, but any full-fat brand works. The eggs should be room temperature—cold eggs can cause cracks in your cake layers. If you're baking ahead, store the dry ingredients (flour, sugar, baking soda) in airtight containers for up to 6 months, and the buttercream can be made a day in advance.
No ripe bananas? Frozen bananas work perfectly—thaw and mash them first. Swap powdered sugar for confectioners' sugar if that's what you have, but sift it well to avoid lumps. For the buttercream, if you can't find heavy whipping cream, 35% whipping cream works in a pinch. The vanilla bean paste adds depth—if you only have extract, double the amount for similar flavor. For a lighter cake, substitute half the milk with almond milk, but the texture might be slightly less tender. And trust me, don't skip sifting the flour—it makes all the difference in a smooth batter.
This cake keeps beautifully—3 days at room temperature covered with a dome, or 1 week refrigerated in layers with parchment between them. For freezing, assemble the cake fully (including buttercream) and freeze for up to 3 months. Let it thaw overnight in the fridge before serving. The buttercream can be stored separately for 5 days in the fridge—just whip it back up with a hand mixer before assembling. And here's a pro tip: chill your cake layers for 15 minutes after baking before frosting—they'll hold their shape better when stacking.
Why You'll Love This Recipe
- No Overmixing Needed: I swear by this—just fold in the mashed bananas and flour until just combined. No stand mixer, no stress, and no dense cake. That butter-egg richness keeps it tender without effort.
- Caramel-Kissed Layers: The secret’s in those ripe bananas—sweet, soft, and packed with natural sugar that caramelizes as it bakes. Topped with a buttery cream cheese frosting? Every slice tastes like dessert you’d pay for at a bakery.
- Lunchbox Legend: Between us, this cake lasts five days in the fridge without drying out. Wrap slices in parchment, toss in a bag, and watch kids (or coworkers) actually eat their fruit. No sad, soggy sandwiches here.
- Pantry Staple Magic: Flour, sugar, butter, eggs—you’re probably missing one ingredient or have three extra. Uses what you’ve got, costs next to nothing, and still feels like a treat. My go-to when grocery money’s tight.
Step-by-step instructions for 3 layer banana cake
Here's how to build a towering cake with moist layers and dreamy buttercream swirls.
👨🍳 Step 1: Prepare the Banana Cake Batter
Preheat your oven to 350°F and grease three 8-inch round cake pans, lining the bottoms with parchment paper. In a large mixing bowl, mash the 3 cups ripe bananas until completely smooth—no lumps should remain, or your cake will be dense. This is your sweet base, so take your time.
In a separate bowl, whisk together the 3 cups all-purpose flour, 1 tsp baking soda, and 0.5 tsp salt. Sift this dry mixture directly into the mashed bananas to avoid clumps. Add the 4 whole large eggs one at a time, mixing just until each is incorporated. Then stir in the 1 cup whole milk and 2 tsp pure vanilla extract.
🍳 Step 2: Mix in Butter and Sugar for Light Texture
In a stand mixer fitted with the paddle attachment, beat the 1.5 cups unsalted butter and 1.5 cups granulated sugar (from the 2.5 cups total) on medium-high speed for 3-4 minutes until light and fluffy. This step is crucial—it incorporates air that will make your cake tender and voluminous.
Gradually add the banana mixture to the butter-sugar blend, mixing on low speed until just combined. Avoid overmixing; you're looking for a smooth batter that falls gently from the spoon. Divide the batter evenly among the three prepared pans, spreading it smoothly to the edges.
🔥 Step 3: Bake Until Golden and Springy
Bake the cakes for 25-30 minutes, or until a toothpick inserted into the center comes out clean and the edges are golden brown. Rotate the pans halfway through baking for even browning. Real talk: Don't open the oven door early—this causes the cakes to sink.
Let the cakes cool in their pans for 10 minutes before transferring to a wire rack to cool completely. This gradual cooling prevents cracking. While they cool, prepare your buttercream—it needs to be at room temperature when you assemble.
🥘 Step 4: Make Vanilla Buttercream Rivers
Beat the 1.5 cups heavy whipping cream in a chilled bowl until soft peaks form. In a separate large bowl, beat the 1.5 cups unsalted butter (remaining from the 2.5 cups total) until smooth. Gradually add the 4 cups powdered sugar and 1 tbsp vanilla bean paste, mixing on low speed until combined.
Increase the speed to medium-high and gradually add the whipped cream, mixing until light and fluffy. This buttercream should pipe smoothly—if it's too thick, add 1 tsp milk at a time. Chill for 30 minutes before using to make piping easier.
🍽️ Step 5: Stack and Decorate with Buttercream Rivers
Level the cooled cakes if needed, then place the first layer on a cake stand or plate. Spread a thin layer of buttercream on top, then pipe a border of buttercream around the edge. Place the second layer on top, repeat with buttercream, then add the final layer.
Pipe rivers of buttercream in a zigzag pattern across the top, letting them cascade down the sides for that dramatic look. Dust with powdered sugar or add fresh banana slices for a pop of color. Serve within 2 days for maximum freshness—this cake tastes even better the next day!
Pro Tips For Making 3 Layer Banana Cake
- Mash Bananas Thoroughly: I learned this the hard way—lumpy banana puree means uneven texture in your cake layers. Use a fork first to break up the fruit, then press through a fine-mesh sieve or blend briefly to remove skins and achieve a silky consistency. No sieve? Fine, but mash until it’s smoother than pancake batter.
- Cream Butter and Sugar Slowly: Dumping cold butter into sugar and whipping it like mad just makes greasy crumbs. Beat the butter and sugar on medium speed until it’s pale and fluffy—about 3-4 minutes—before adding eggs one at a time. This ensures your cake layers stay tender, not dense.
- Don’t Overmix the Batter: I used to treat cake batter like cookie dough, mixing until it was smooth and homogeneous. Big mistake. Fold in the dry ingredients just until combined—lumps are fine—and stop when the batter clings to the spoon. Overmixing = tough cake layers.
- Cool Layers Fully Before Frosting: Slapping frosting on warm cake layers is a recipe for a soggy disaster. Let each layer cool in the pan for 10 minutes, then transfer to a wire rack to cool completely—about 20-30 minutes total. Patience here guarantees clean slices and no messy frosting slides.
Common mistakes when making this dish
Overbaking the Layers
I’ve seen this happen more times than I can count—cakes that turn out dry and crumbly because they were left in the oven too long. The toothpick test is your best friend: insert it into the center, and if it comes out clean (with maybe a few moist crumbs), that’s perfect. If you see dry crumbs or the cake pulls away from the pan edges, you’ve gone too far. 25-30 minutes at 350°F is your sweet spot—set a timer and resist the urge to peek early. 💡
Skipping the Cooling Step
Rushing to frost warm cake layers is a surefire way to end up with a collapsed tower. Let each layer cool in the pan for 10 minutes first, then transfer to a wire rack to cool completely. This gradual cooling prevents cracking and ensures the buttercream adheres properly. Trust me, 15 minutes of patience now saves hours of frustration later.
Not Leveling the Cakes
Uneven layers make stacking nearly impossible and ruin that clean, professional look. Use a serrated knife or a cake leveler to trim any domed tops before frosting. I like to run the knife gently over the cake in a circular motion—just a little pressure goes a long way. This step is especially critical for the bottom layer, as it sets the foundation for your entire cake. 🔥
Overmixing the Batter
When you mix the banana batter too vigorously, you develop the gluten in the flour, which leads to a tough, dense cake. Once the dry ingredients are incorporated, mix just until combined—think "gentle swirls" rather than "whipping into submission." The batter should look smooth and fall from the spoon in ribbons, not clumps. This is where patience pays off in every bite.
Using Cold Buttercream
Cold buttercream is a piping nightmare—it’s thick, stubborn, and won’t hold its shape. Always chill your buttercream for 30 minutes before using it to pipe rivers or borders. If it’s still too thick, add milk 1 tsp at a time until it reaches a smooth, spreadable consistency. Pro tip: Use a pastry bag with a large star tip for those dramatic rivers, and work quickly to avoid warming the buttercream.
Ignoring the Butter Temperature
Room-temperature butter is non-negotiable for both the cake and buttercream. Cold butter creates dense layers, while butter that’s too soft can cause the batter to separate. To test, press a thumb into the butter—it should leave a slight indentation but hold its shape. If your kitchen is warm, let the butter sit out for 1-2 hours before starting. For the buttercream, cold butter whips better and gives you that silky texture we all love. ✨
Nutrition facts
Frequently asked questions
Can I substitute ripe bananas with other fruit?
While bananas give this cake its signature flavor, you can swap 1 cup mashed bananas with 1 cup applesauce or 1 cup pumpkin puree for a different twist. For best results, use a mix of banana and substitute—like 2 cups banana + 1 cup applesauce—to maintain moisture. Avoid overly watery fruits like peaches or pears.
How do I make this cake gluten-free?
Replace the 3 cups all-purpose flour with a 1:1 gluten-free baking flour blend like Bob's Red Mill or King Arthur. Add 1 tsp xanthan gum to help bind the layers. For the buttercream, ensure your powdered sugar is gluten-free certified. The texture will be slightly denser but still delicious!
Can I bake this cake in a different pan size?
Yes, but adjust baking times accordingly. For 6-inch pans, bake 20-25 minutes, and for 9-inch pans, bake 30-35 minutes. The key is to bake until a toothpick comes out clean. If using different sizes, divide the batter evenly—don't overfill pans, or your layers may overflow.
Why did my cake layers crack on top?
Cracking usually happens when layers cool too quickly or are overbaked. Let cakes cool in pans for 10 minutes before removing, and always bake until a toothpick comes out with moist crumbs, not dry. For extra insurance, chill the assembled cake in the fridge for 1 hour before slicing.
How can I make this cake vegan?
Use flax eggs (replace each egg with 1 tbsp ground flax + 3 tbsp water), vegan butter, and almond milk. For the buttercream, swap heavy cream for coconut cream or vegan whipped topping**. Chill all vegan ingredients before mixing to mimic the texture of dairy products.