
Desserts
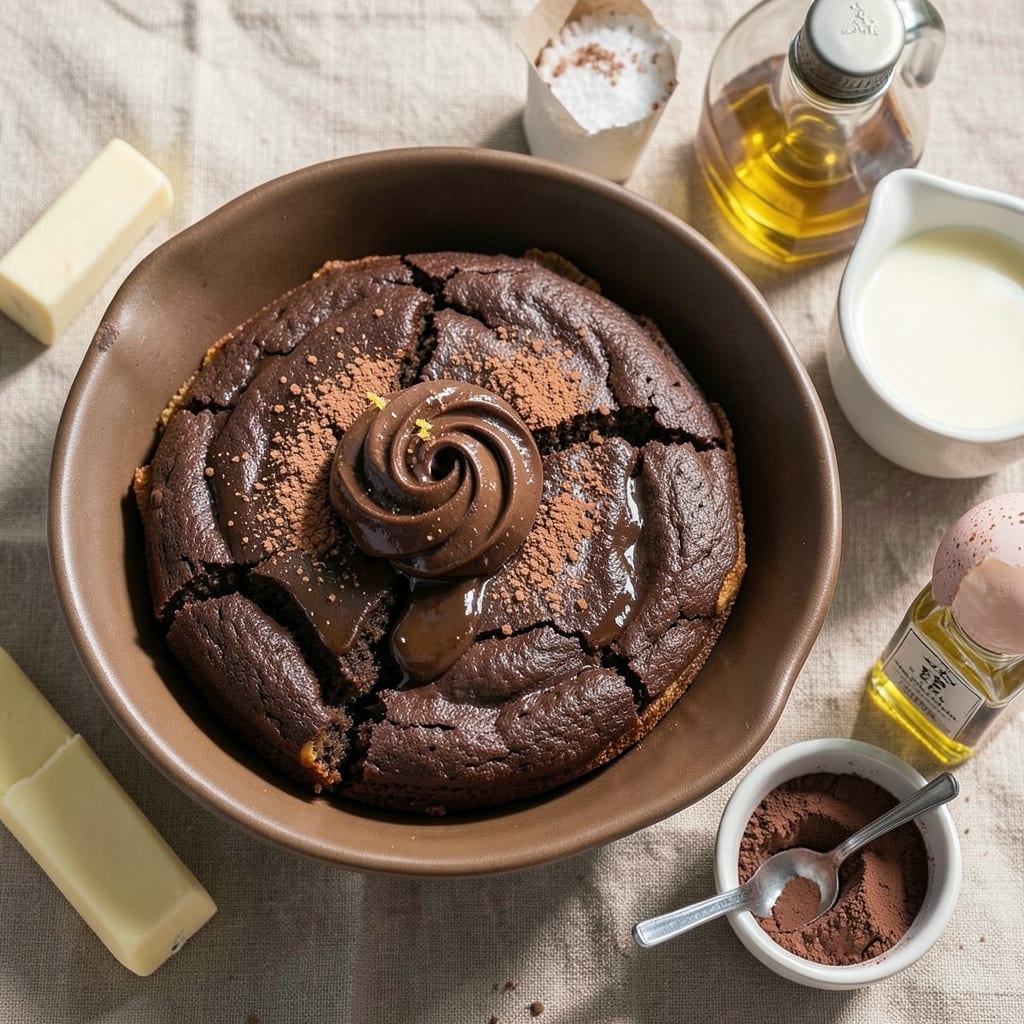
This all-in-one chocolate cake recipe delivers decadent, fudgy perfection with just one bowl and minimal effort. The secret lies in a precise ratio of cocoa powder to butter, creating that signature dense yet moist texture that keeps slices falling apart at the touch. I've baked this recipe dozens of times—it never fails to impress, whether for birthdays or spontaneous dessert cravings.
What makes this recipe truly special is the single-bowl method, which eliminates extra mixing and cleanup. You'll combine all ingredients in one bowl, then bake until a toothpick comes out with moist crumbs—not wet batter. The cake develops a rich chocolate flavor with a slightly crisp crust that contrasts beautifully with the velvety interior.
By the time you pull it from the oven, you'll have a professional-quality chocolate cake that requires no frosting to shine. The natural sheen from melted butter creates an elegant finish, while the dense texture makes every bite worth savoring. This recipe serves 8-10 and comes together in under 30 minutes of active time.
For an extra touch, dust with powdered sugar or serve with a dollop of whipped cream. The simplicity of this recipe belies its restaurant-worthy results—perfect for both beginners and experienced bakers looking for a foolproof chocolate dessert.
Ingredients for all in one chocolate cake
Twelve essential ingredients transform into restaurant-worthy chocolate cake with minimal effort.
| Ingredient | Amount | Notes |
|---|---|---|
| Unsalted Butter 🧈 | 1 cup | Melted, cooled slightly for mixing |
| Granulated Sugar 🍚 | 2 cups | White or light brown preferred |
| Cocoa Powder 🍫 | ¾ cup | Natural, unsweetened cocoa |
| All-Purpose Flour 🌾 | 1 ½ cups | Sifted for even texture |
| Large Eggs 🥚 | 2 whole | Room temperature for smooth mixing |
| Vanilla Extract 🌿 | 1 tbsp | Pure, high-quality extract |
| Baking Powder 🧂 | 1 ½ tsp | Aluminum-free preferred |
| Salt 🧂 | ½ tsp | Fine sea salt for balance |
| Milk 🥛 | ½ cup | Whole milk for richness |
| Vegetable Oil 🫒 | ¼ cup | Light or neutral oil |
| Instant Espresso Powder ☕ | 1 tsp | Enhances chocolate depth |
| Powdered Sugar 🍚 | ¼ cup | For dusting optional topping |
The cocoa powder is the heart of this recipe—natural, unsweetened cocoa delivers the richest flavor, while Dutch-processed can make the cake slightly denser. Ghirardelli or Hershey's Special Dark are my go-to brands for consistent results. Butter quality matters too; European-style unsalted butter like Plugrá melts beautifully for that signature sheen. For the flour, King Arthur or Gold Medal all-purpose work best due to their protein balance, ensuring the perfect crumb structure. The instant espresso powder might seem unusual, but it deepens the chocolate flavor without adding bitterness—a professional baker's secret.
No cocoa powder? Dutch-processed cocoa plus 1/4 tsp baking soda mimics the effect, though the texture may vary slightly. Substituting milk? Almond milk works but reduces richness—use it only if necessary. For a lighter cake, replace half the butter with vegetable oil, though the texture will be slightly less tender. The vanilla extract should be pure—imitation extracts contain propylene glycol, which can alter the flavor. If you're gluten-free, swap the all-purpose flour for a 1:1 gluten-free baking blend and add an extra 1/4 cup. The powdered sugar topping is optional but adds a professional finish—use it only if you prefer a more elegant presentation.
Store the cake in an airtight container at room temperature for up to 3 days—it actually improves overnight as flavors meld. For longer storage, wrap tightly in plastic and refrigerate for up to 1 week. The cake freezes beautifully for 3 months; wrap each slice individually in plastic wrap before freezing. To reheat, warm at 300°F for 5-10 minutes to restore moisture. This recipe doubles as a perfect cake for layering with ganache or whipped cream—just save half the batter before baking to create a second layer.
Why You'll Love This Recipe
- One-Bowl Magic: I swear by this recipe when I’m too tired to wash extra bowls. Just cream the butter and sugar, toss in the eggs, fold in the dry ingredients—no sifting, no mixing madness. The cocoa powder does all the heavy lifting for that deep, rich flavor without fuss.
- Rich Without Fuss: That first bite? Pure chocolate satisfaction. The butter and sugar create this melt-in-your-mouth texture, while the cocoa powder gives it that real chocolate taste—not the bitter aftertaste of some boxed mixes. Honestly, it’s the kind of cake that makes you close your eyes and sigh.
- Birthday or Breakfast: Between us, this cake works for everything. Frost it with whipped cream for a last-minute birthday cake, or slice it up for a weekend brunch with coffee. My kids even ask for it plain—no frosting, no decorations—just straight from the pan. (Yes, even on a Tuesday night.)
- Budget-Friendly Luxury: You’re using pantry staples here—no specialty ingredients, no overpriced shortcuts. A stick of butter, a bag of sugar, a handful of eggs—that’s it. And the best part? It keeps well for days, so you can bake once and enjoy it all week without guilt. My secret weapon for stress-free dessert.
Step-by-step instructions for single-bowl chocolate cake
This method delivers rich, fudgy layers with minimal effort—just one bowl and simple techniques.
Melt Butter and Combine Wet Ingredients
In a large mixing bowl, melt the 1 cup unsalted butter over a heatproof bowl set over simmering water, stirring occasionally until fully melted. Let it cool slightly—you want it warm enough to blend smoothly but not hot enough to cook the eggs. Add the 2 cups granulated sugar, 0.5 cup milk, and 0.25 cup vegetable oil to the bowl with the melted butter.
Whisk vigorously for 2-3 minutes until the mixture becomes smooth and slightly thickened. The sugar should dissolve completely, and the mixture should look glossy. This step ensures even moisture distribution throughout the batter, preventing dry spots in your cake. If you notice any undissolved sugar granules, whisk a bit longer to fully incorporate them.
Incorporate Eggs and Dry Ingredients
Add the 2 whole large eggs, one at a time, whisking well after each addition until fully combined. The mixture will thicken noticeably as the eggs incorporate. Stir in the 1 tbsp vanilla extract and 1 tsp instant espresso powder—this subtle coffee note enhances the chocolate flavor without overpowering it.
In a separate bowl, sift together the 1.5 cups all-purpose flour, 1.5 tsp baking powder, and 0.5 tsp salt. Gradually add the dry ingredients to the wet mixture, folding gently with a spatula just until combined. Avoid overmixing—stop as soon as the flour disappears. Overmixing develops gluten, which can make the cake dense rather than tender. The batter should be thick but pourable, with a velvety texture.
Fold in Cocoa Powder for Maximum Richness
Sprinkle the 0.75 cup cocoa powder over the batter and fold it in using a spatula, cutting through the center and lifting from the bottom to ensure even distribution. The cocoa should dissolve completely, creating a deep, chocolatey hue. If you notice any streaks of undissolved cocoa, whisk briefly to incorporate fully. This step is crucial for achieving that signature fudgy texture and rich flavor.
Let the batter rest for 5 minutes at room temperature. This brief resting period allows the flour to fully hydrate and the ingredients to meld together, resulting in a smoother, more cohesive batter. The batter should be thick but still able to flow when poured—if it looks too stiff, give it a quick stir to loosen it up.
Bake to Perfect Doneness
Preheat your oven to 350°F and grease two 8-inch round cake pans (or one 9x13-inch pan) thoroughly with butter or baking spray. Divide the batter evenly between the pans. Bake for 30-35 minutes (or 25-30 minutes for the larger pan) until a toothpick inserted into the center comes out clean with just a few moist crumbs clinging to it. The edges should be set, but the top should still look slightly soft—this indicates a moist, fudgy interior.
For even baking, rotate the pans halfway through the baking time if your oven has hot spots. The cake is done when the edges pull away slightly from the pan and the top springs back when gently pressed. If the top browns too quickly, tent the pans loosely with aluminum foil after the first 15 minutes of baking to prevent over-browning while allowing the cake to continue cooking underneath.
Cool and Serve with Confidence
Remove the cakes from the oven and let them cool in the pans for 10 minutes. Then, transfer them to a wire rack to cool completely. This gradual cooling process prevents the cakes from cracking as they set. Once fully cooled, dust the tops with 0.25 cup powdered sugar for a classic finishing touch. The cake should be moist, rich, and fudgy with a velvety crumb—perfect for slicing and serving.
For the best results, serve the cake at room temperature. If you're making it ahead, store it in an airtight container at room temperature for up to 3 days or refrigerate for up to 5 days. The flavors deepen as the cake sits, making it even more delicious the next day. Enjoy with a dollop of whipped cream or a scoop of vanilla ice cream for a decadent dessert experience.
Pro Tips For Making All In One Chocolate Cake
- Melt Butter Slowly: I learned this the hard way—dumping cold butter into hot sugar makes a greasy mess that never emulsifies right. Warm the butter in the microwave for 20-30 seconds first, then mix it into the sugar while beating on medium-high. The butter will melt faster and create a smoother batter from the start.
- Sift the Cocoa: That cocoa powder is heavier than it looks, and clumps sneak into the batter without you noticing. Sift it directly into the dry ingredients (flour, baking powder, salt) before adding liquids—this guarantees even distribution and prevents a dense, cakey texture. Yes, even if you’re impatient like me.
- Test Doneness with a Toothpick: The cake will look done before it actually is, and overbaking turns it dry. Stick a toothpick in the center—it should come out with a few moist crumbs, not wet batter. If you’re unsure, check at 10 minutes before the recipe’s suggested time and tent with foil if needed.
- Use Room-Temp Eggs: Cold eggs sink to the bottom of the batter and create uneven texture. Let them sit in warm water for 5 minutes before cracking them in—this ensures they blend smoothly and distribute evenly. (Your future self will thank you when you cut into a perfectly uniform slice.)
Pro cooking tips for perfect results
Butter Temperature Matters
The butter should be melted but not hot—around 110-115°F—when mixing with other wet ingredients. I use a double boiler to melt 1 cup unsalted butter (like Plugrá for best results) because overheating can scramble the eggs later. Test it by touching a drop on your wrist: it should feel warm but not burning. If your butter is too hot, chill the bowl for 5 minutes before proceeding. 🌡️
Whisk Like a Pro
Vigorously whisk the wet ingredients for 2-3 minutes until the mixture turns glossy and thickens slightly. This step emulsifies the butter, sugar, and oil, creating a stable base for the cake. I use a balloon whisk for its wide surface area—it incorporates air better than a fork. If you see sugar granules lingering, keep whisking until fully dissolved, or your cake may taste grainy. 💛
Cocoa Folding Technique
Sprinkle the 0.75 cup cocoa powder over the batter and fold it in using a spatula in a "J" motion. This prevents clumping and ensures even distribution. I press the spatula against the bowl's bottom to lift undissolved bits from the edges. For extra richness, sift the cocoa first—this removes any lumps that could create dry spots in your cake. 🍫
Baking Powder Timing
Add the 1.5 tsp baking powder with the flour, but don't mix it in until the very end. This ensures the leavening agent activates at the perfect moment during baking. Overmixing after adding baking powder can deflate the batter. Once combined, stop mixing immediately—just until the flour disappears. The goal is a thick, pourable batter with no dry streaks. ⚡
Toothpick Test Done Right
Insert a toothpick into the center of the cake—it should come out with moist crumbs, not wet batter or dry crumbs. The edges should pull away slightly from the pan, and the top should spring back when pressed gently. If your oven runs hot, check at 28 minutes for round pans. For the 9x13-inch pan, aim for 25 minutes—this smaller volume bakes faster. 🔥
Cool Gradually for Perfect Texture
Let the cake cool in the pan for 10 minutes before transferring to a wire rack. This gradual cooling prevents cracking as the cake sets. I tap the pan gently on the counter to loosen the edges before removing. For extra moisture, brush the warm cake with 2 tbsp simple syrup** (equal parts sugar and water, heated until dissolved). This step keeps the cake tender for days. 💫
Nutrition facts
Frequently asked questions
Why does this recipe use both butter and oil?
The combination creates the perfect texture—butter adds richness and flavor while oil keeps the cake moist for days. Butter contributes to that classic cake sheen, while oil prevents dryness. This balance is key for a fudgy yet tender crumb that stays fresh longer.
Can I make this cake in a different pan size?
Yes! For a 9x13-inch pan, bake at 350°F for 25-30 minutes—it bakes faster than round pans. If using 6-inch pans, increase baking time to 35-40 minutes and check early. Always adjust for your oven's hot spots by rotating pans halfway through.
What if my cake turns out too dense? Overmixing or underbaking usually causes density.
How do I store leftovers to keep them fresh?
Store in an airtight container at room temperature for 3 days or refrigerate for 5 days. For longer storage, wrap slices individually and freeze for 3 months. Thaw at room temperature for 1-2 hours before serving. The cake actually improves overnight as flavors meld!
Can I substitute Dutch-process cocoa?
Yes, but add 1/4 tsp baking soda to balance the acidity. Dutch-process cocoa is slightly darker and less acidic, which can make the cake denser. For best results, stick with natural, unsweetened cocoa and measure accurately—too much can make the cake bitter or dry.