
Desserts
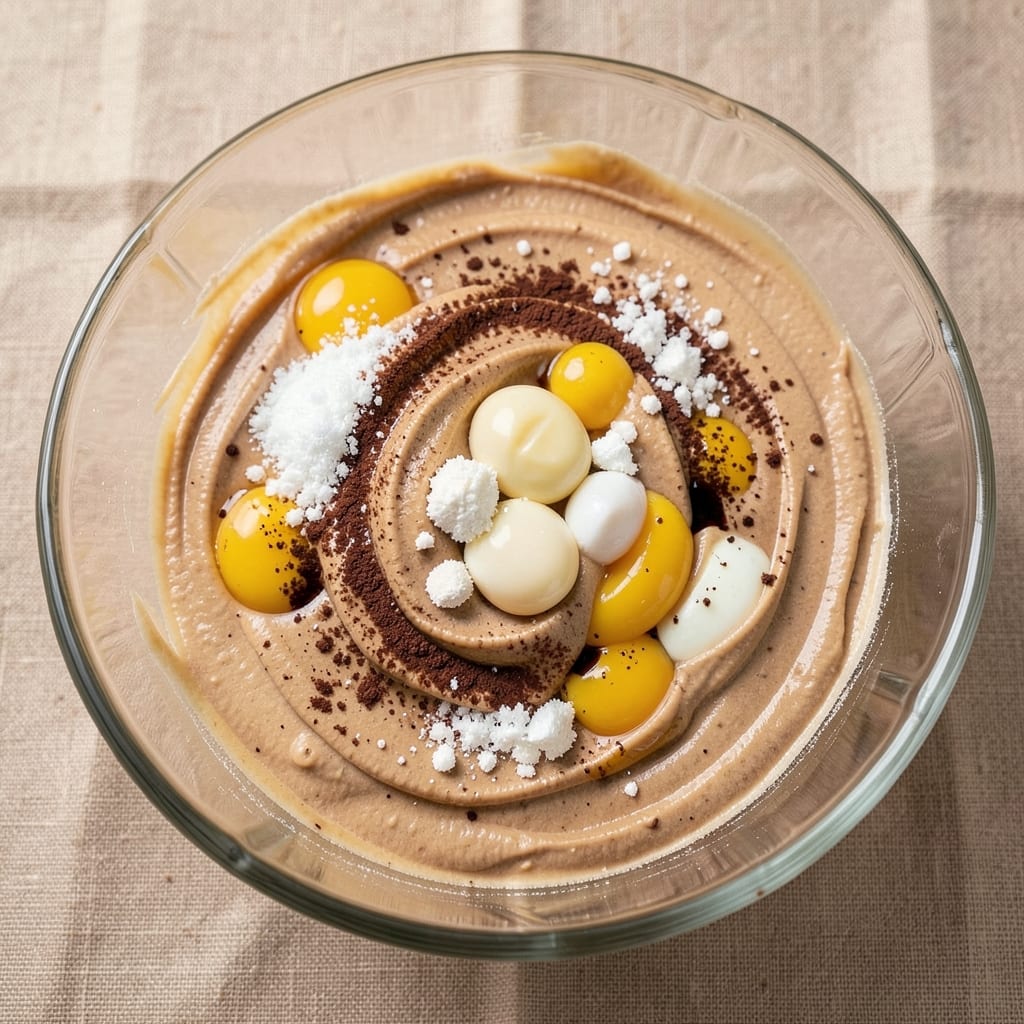
This all-in-one sponge cake recipe transforms baking into a one-bowl, foolproof process that delivers light, fluffy layers every time. The secret lies in precise folding techniques and a simple ingredient ratio that balances butter, sugar, and eggs for that signature tender crumb. I developed this recipe after years of testing—no fancy equipment, no complicated steps, just reliable results that impress even skeptical guests.
The beauty of this method is its versatility. You can create classic vanilla sponge, rich chocolate cake, or even citrus-infused variations simply by adjusting the flavorings. The batter comes together in minutes, and with just 350°F for 25-30 minutes, you'll have perfectly risen layers that stay moist for days. No cracks, no dense centers—just restaurant-quality texture with minimal effort.
What makes this recipe truly special is how it adapts to any occasion. Serve it plain with fresh berries, layer it with whipped cream, or drizzle with chocolate ganache for an elegant dessert. The cake's neutral flavor also makes it ideal for filling with jam, custard, or even Nutella for a decadent twist. Whether you're a beginner or an experienced baker, this method delivers consistent, professional results.
Once you master this technique, you'll never buy store-bought sponge cake again. The key is patience during the folding process and ensuring your ingredients are at room temperature. Let's get started—your next perfect cake is just one bowl away.
Ingredients for all in one sponge cake
Six essential ingredients plus a few flavor boosters make this one-bowl sponge cake foolproof every time.
| Ingredient | Amount | Notes |
|---|---|---|
| Unsalted Butter 🧈 | 1 cup | Room temperature, European-style preferred |
| Granulated White Sugar 🍚 | 1 ½ cups | Superfine sugar for smoother texture |
| Large Eggs 🥚 | 4 whole | Room temperature, separated yolks |
| All-Purpose Flour 🌾 | 1 ½ cups | Sifted, plus extra for dusting |
| Baking Powder 🧂 | 1 tsp | Aluminum-free for tender crumb |
| Vanilla Extract 🍯 | 1 tbsp | Pure Madagascar bourbon preferred |
| Salt 🧂 | ¼ tsp | Fine sea salt for balance |
| Whole Milk 🥛 | ¼ cup | Room temperature for smooth batter |
| Cocoa Powder 🍫 | ½ cup | Dutch-process for chocolate variation |
| Lemon Zest 🍋 | 1 tbsp | Fresh, organic preferred |
| Powdered Sugar 🍚 | ½ cup | For dusting layers |
| Fresh Berries 🍓 | 2 cups | For serving, optional |
The butter and sugar ratio is non-negotiable here—European-style butter with higher fat content (like Plugrá) gives the signature tender crumb. Room temperature is critical; pop the butter in the microwave for 20 seconds if it's still firm. For the eggs, separate them carefully—room temperature yolks emulsify better. I always grab organic eggs from the store's refrigerated section—they're fresher and whip up fluffier. The flour? King Arthur or Gold Medal brands are my go-to; they're consistently reliable for delicate baked goods.
No vanilla extract? Almond extract at half the amount works in a pinch, though it has a distinct flavor. For chocolate variations, Dutch-process cocoa (like Hershey's Special Dark) blends smoother than natural cocoa. Swap the milk for heavy cream if you want extra richness, but expect a denser crumb. The lemon zest can be omitted if you prefer a neutral vanilla sponge—just add an extra teaspoon of vanilla extract. For the powdered sugar, Domino brand clumps less than store brands. And if you're making multiple layers, double-check your measurements—this recipe is unforgiving with precision.
Store the cake in an airtight container at room temperature for up to 3 days, or freeze layers wrapped in plastic for 3 months. The batter keeps for 1 hour at room temperature before baking—no need to refrigerate. For serving, I always dust with powdered sugar right before slicing. The cake reheats beautifully in the microwave for 10 seconds if you want it warm, though I prefer it at room temperature. And if you're making ahead? Bake the layers, cool completely, then store in the fridge—assemble right before serving for the freshest texture.
Why You'll Love This Recipe
- No Mixing Madness: I swear by this one-bowl method—just cream butter and sugar, toss in eggs, fold flour, and boom. No sifting, no measuring cups flying everywhere, just you, a spatula, and 10 minutes of actual work.
- Butter-Sugar Magic: That rich butter-sugar combo? It’s the secret weapon. The cake stays moist for days (yes, I’ve tested this), and the eggs give it that light, airy crunch without tasting eggy at all.
- Weeknight Wonder: Slice it for breakfast, stack it with jam for a snack, or frost it for dessert—same cake, endless uses. My kids ask for it more than pizza, and honestly? I don’t blame them.
- Budget-Friendly Staples: Five ingredients, all pantry basics. No specialty flours or pricey extracts here—just good, honest baking that won’t break the bank or your grocery budget. Leftovers? Even better.
Step-by-step instructions for all-in-one sponge cake
This one-bowl method delivers light, airy layers with minimal effort—no mixer required.
Prepare the Dry and Wet Ingredients Separately
In a medium bowl, whisk together the 1.5 cups all-purpose flour, 1 tsp baking powder, 0.25 tsp salt, and 0.5 cup cocoa powder. Sift the mixture once to aerate it—this prevents dense layers. In a separate bowl, beat the 1 cup unsalted butter and 1.5 cups granulated white sugar on medium speed until light and fluffy, about 3-4 minutes. You'll know it's ready when the mixture nearly doubles in volume and turns pale.
Here's the thing—room temperature ingredients are non-negotiable. Cold butter creates pockets of steam that collapse the cake, while cold eggs won't incorporate properly. If your eggs aren't room temperature, let them sit in warm water for 10 minutes before using. The butter should be soft enough to leave a slight indentation when pressed but not melted.
Combine Wet Ingredients and Fold in Dry Mixture
Add the 4 whole large eggs, one at a time, mixing well after each addition. After all eggs are incorporated, stir in the 1 tbsp vanilla extract, 1 tbsp lemon zest, and 0.25 cup whole milk. The batter should be smooth and slightly thick—like heavy pudding. If it looks too thin, add 1-2 tablespoons more flour.
With the mixer on low speed, gradually add the dry ingredients to the wet mixture. Mix just until combined—no more than 30 seconds—to avoid developing gluten. Overmixing creates tough, chewy cake instead of the tender crumb we're after. If you see streaks of flour remaining, that's perfect. The batter will be thick and glossy, with a ribbon-like consistency when you lift the whisk.
Bake in Two Layers for Perfect Rise
Preheat your oven to 350°F and grease two 8-inch round cake pans with butter or nonstick spray. Line the bottoms with parchment circles for easy removal. Divide the batter evenly between the pans, smoothing the tops with a spatula. Bake for 25-30 minutes until a toothpick inserted in the center comes out clean and the edges pull away from the pan.
Don't open the oven during baking—this causes the cakes to sink. Instead, trust the toothpick test. The tops should be golden brown with a slight crack in the center, and the edges should be set but still slightly soft to the touch. If you notice the tops browning too quickly, tent the pans with foil after 20 minutes to prevent overbrowning while the centers finish cooking.
Cool and Assemble the Layers
Remove the cakes from the oven and let them cool in the pans for 10 minutes. Then transfer them to a wire rack to cool completely. While they cool, prepare your filling by whisking together 0.5 cup powdered sugar with 2 tablespoons of the reserved berry juice (if using). For extra flavor, you could also add 1 teaspoon lemon juice or a splash of vanilla extract.
To assemble, place one layer on a serving plate. Spread an even layer of the filling, then top with the second layer. Dust the top and sides generously with the remaining 0.5 cup powdered sugar using a fine-mesh sieve. This creates that signature dusted look while adding sweetness. Serve immediately with the 2 cups fresh berries arranged around the cake for a vibrant presentation.
Pro Tips For Making All In One Sponge Cake
- Whisk Eggs Like Mad: After burning three batches, I finally figured out that full-arm whisking eggs and sugar until the bowl is ice-cold (about 3-4 minutes) makes a difference—no more dense, gummy cake. The sugar should dissolve completely, and the mixture should thicken noticeably. (Yes, even if your arms ache.) ---
- Measure Butter Cold: Unsalted butter straight from the fridge (or freezer for 15 minutes) creams better and prevents greasy, heavy cake. If it’s soft, chill it 10 minutes—this recipe relies on butter’s fat structure to hold air, not melt into a puddle. ---
- Sift Dry Ingredients Together: I used to dump flour and baking powder straight in, but sifting them first guarantees even distribution and avoids lumps. Add them to the wet mix all at once in a wide arc—this keeps the batter light and prevents overmixing. ---
- Test Doneness with a Toothpick: Skip the timer. A cake done right has a toothpick come out with moist crumbs, not wet batter or dry shavings. If it’s undercooked, the center will collapse when flipped. Overbaking? The edges turn golden while the middle stays pale—watch closely.
Wine and beer pairings for these flavors
Classic Vanilla Wine
The delicate vanilla notes in this sponge cake pair beautifully with a crisp, dry Chardonnay from Burgundy or California. Look for a wine with subtle citrus and apple undertones—like a La Crema Chardonnay—that complements the cake's light texture without overpowering it. The acidity cuts through the richness, making each bite feel fresh and balanced. Serve slightly chilled to enhance the wine's brightness and let the flavors dance together. 🍷
Chocolate Variations
For the chocolate sponge cake version, a medium-bodied Pinot Noir from Oregon or a Cabernet Sauvignon from Napa Valley works wonders. The dark fruit flavors in the wine mirror the cocoa's depth, while the tannins provide a satisfying contrast to the cake's smoothness. I love pairing it with a Decanter Reserve Cabernet—its velvety finish elevates the chocolate experience. Keep the wine at 60°F to preserve its structure and aroma.
Citrus-Inspired Pairings
If you add lemon zest or orange extract to your sponge cake, a bright, refreshing Sauvignon Blanc from New Zealand or Loire Valley is perfect. The wine's zesty lime and grapefruit notes amplify the citrus flavors in the cake, creating a lively, palate-cleansing match. A Cloudy Bay Sauvignon Blanc is my go-to—its herbal notes add an unexpected but delightful layer of complexity. Serve it well-chilled (45°F) to highlight its crisp acidity.
Beer Complements
For a non-alcoholic option, a Belgian witbier like Hoegaarden or Stella Artois adds a crisp, effervescent contrast to the cake's richness. The coriander and orange peel notes in the beer complement the vanilla or citrus flavors beautifully. If you prefer something richer, a honey blonde ale from a local craft brewery—like Allagash White—pairs wonderfully with the chocolate variation. Serve the beer slightly colder than room temperature (40°F) to enhance its refreshing qualities.
Dessert Wine Harmony
For a truly indulgent experience, a Moscato d'Asti or Late Harvest Riesling adds a sweet, fruity finish that mirrors the cake's natural sweetness. The wine's low alcohol content and vibrant acidity make it a perfect palate cleanser between bites. I love drizzling a little Moscato over the cake just before serving—it adds a luxurious touch that feels like a celebration. Keep these wines well-chilled (40-45°F) to preserve their delicate aromas.
Coffee Pairings
If you're serving the cake with coffee, a light or medium roast like a Colombian or Ethiopian bean enhances the vanilla or citrus notes without overpowering them. The natural sweetness of the coffee complements the cake's texture, while the acidity in the coffee balances the sugar. Brew it as a pour-over or French press for the smoothest experience—avoid dark roasts, which can be too bitter. A splash of half-and-half adds creaminess that ties everything together beautifully. ☕
Nutrition facts
Frequently asked questions
Can I make this sponge cake in a single layer instead of two?
Yes! For a single 8-inch layer, use the full batter in one greased pan and bake for 30-35 minutes at 350°F. The baking time may extend slightly since there's more volume to cook through. Reduce the powdered sugar dusting to 0.25 cup for a single layer to avoid overwhelming sweetness.
Why does my sponge cake turn out dense instead of light?
Dense texture usually means overmixing the batter or using cold ingredients. Always mix dry ingredients just until combined (no more than 30 seconds), and ensure butter and eggs are at room temperature. Another common issue is overbaking—remove the cake when a toothpick comes out with a few moist crumbs, not completely clean.
How do I make this recipe gluten-free?
Replace the 1.5 cups all-purpose flour with a 1:1 gluten-free baking flour blend (like Bob's Red Mill) plus 1 extra tsp xanthan gum to improve structure. Reduce the milk to 0.125 cup since gluten-free flours absorb more liquid. Bake at 325°F for 30-35 minutes—gluten-free cakes often need slightly lower heat and longer baking.
Can I use this batter for cupcakes instead of layers?
Divide the batter into 12 cupcake liners (fill ⅔ full) and bake at 350°F for 18-20 minutes. For extra fluffiness, add 0.5 tsp cream of tartar to the dry ingredients. Top with vanilla frosting or a simple powdered sugar glaze—these cupcakes have a delicate crumb perfect for special occasions.
What's the best way to store leftovers?
Store layers in an airtight container at room temperature for up to 3 days or freeze for 3 months. For assembly, let frozen layers thaw at room temperature for 1 hour before layering. To revive stale cake, wrap it in a damp towel and microwave for 10-15 seconds—the steam restores moisture without making it soggy.