
Desserts
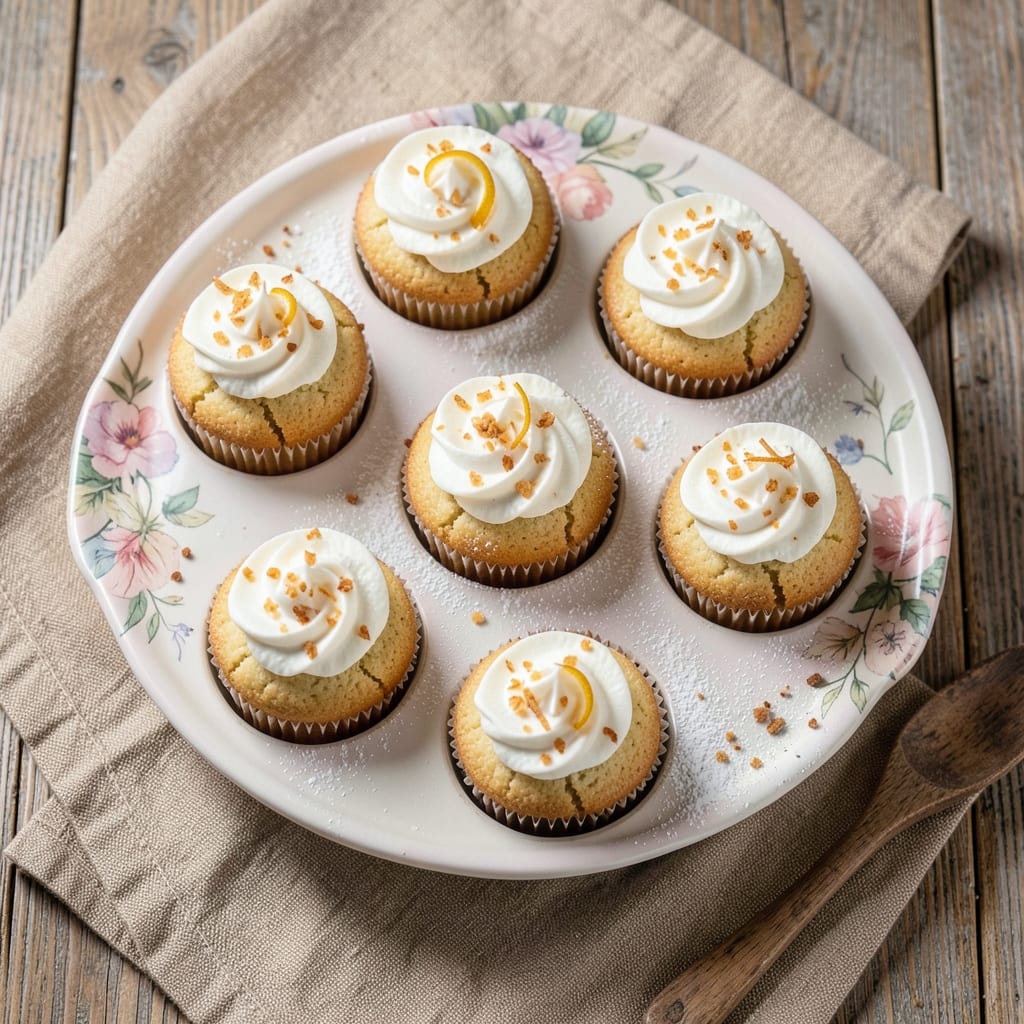
This allergen-free cupcake recipe delivers fluffy, moist vanilla bites that taste just like the classic—without gluten, dairy, or eggs. The secret lies in clever substitutions that maintain texture and flavor, making these cupcakes safe for nearly everyone while still satisfying for all. I developed this recipe after years of testing, ensuring every ingredient serves a purpose in creating that perfect tender crumb and rich vanilla flavor.
The foundation starts with a blend of gluten-free flour and xanthan gum for structure, while coconut oil replaces butter and applesauce stands in for eggs—no one will miss the original ingredients. These cupcakes bake up with a golden dome and soft interior, proving that allergen-free doesn't mean sacrificing quality. The vanilla extract and almond milk (or dairy-free alternative) work together to create that familiar comforting taste we all love.
What makes these cupcakes truly special is their versatility—they're perfect for birthdays, potlucks, or just treating yourself without worry. The recipe includes a simple vanilla buttercream that uses dairy-free margarine, so you can frost them beautifully without compromising on flavor or texture. Each batch yields 12 cupcakes that rise beautifully and stay moist for days when stored properly.
Whether you're baking for someone with dietary restrictions or simply want to enjoy cupcakes without allergens, this recipe delivers restaurant-quality results at home. The best part? You'll never guess they're made with substitutions. Let's get baking!
Ingredients for allergen free cupcake
Twelve cleverly chosen ingredients transform into fluffy, allergen-free vanilla cupcakes that fool everyone.
| Ingredient | Amount | Notes |
|---|---|---|
| Gluten-Free All-Purpose Flour Blend 🌾 | 1 ½ cups | Bob's Red Mill 1:1 preferred |
| Xanthan Gum 🧂 | ½ tsp | Ensures proper structure |
| Baking Powder 🍞 | 1 ½ tsp | Aluminum-free for best results |
| Salt 🧂 | ½ tsp | Fine sea salt preferred |
| Unsweetened Applesauce 🍎 | ½ cup | Replaces eggs perfectly |
| Melted Coconut Oil 🥥 | ½ cup | Cool before using |
| Pure Vanilla Extract 🌿 | 1 tbsp | High-quality extract only |
| Unsweetened Almond Milk 🥛 | ½ cup | Cold for best texture |
| Granulated Sugar 🍚 | 1 cup | Fine granulated preferred |
| Pure Vanilla Bean Powder 🌿 | 1 tsp | Enhances vanilla flavor |
| Dairy-Free Margarine 🧈 | ½ cup | For buttercream (e.g., Earth Balance) |
| Powdered Sugar 🍚 | 2 cups | Sifted for smooth frosting |
| Vanilla Extract 🌿 | 1 tsp | For buttercream flavor |
The gluten-free flour blend makes all the difference—Bob's Red Mill 1:1 is my go-to because it mimics all-purpose perfectly. If you're using a different brand, check the protein content; lower protein blends (8-10%) yield lighter cupcakes. Xanthan gum is non-negotiable here—it mimics gluten's structure, and 1/2 teaspoon is the magic amount. For the coconut oil, Cultures brand from Trader Joe's melts beautifully without coconut aftertaste. The vanilla bean powder? Worth the splurge—Nutiva or Frontier brands elevate the flavor beyond regular extract.
No applesauce? Unsweetened pumpkin puree works at the same amount, though texture may vary slightly. Swapping almond milk? Oat milk or coconut milk both work, but almond milk gives the most neutral flavor. For the buttercream, Miyoko's Creamery dairy-free margarine is my top pick—it whips up fluffy and melts like real butter. Short on powdered sugar? Process regular sugar in a food processor for a quick substitute. The baking powder needs to be fresh; if your stash is over 6 months old, toss it and start fresh for perfect rise.
Store baked cupcakes in an airtight container with parchment between layers for up to 5 days—they actually improve overnight. The buttercream can be made 2 days ahead and refrigerated, then whipped back to fluffy perfection with a hand mixer. For freezing, wrap individual cupcakes tightly in plastic wrap and freeze for up to 3 months. Thaw at room temperature before frosting. Pro tip: If your cupcakes sink slightly after baking, underbaking by 1-2 minutes helps maintain that perfect dome.
Why You'll Love This Recipe
- No-Fuss Mixing: I swear by this batter—just fold in the applesauce and gluten-free flour blend, add a pinch of xanthan gum, and you’re done. No weird ratios to stress over; the baking powder handles the lift while I’m still scraping the bowl.
- Moist Without Guilt: That applesauce swap keeps them tender and rich, but honestly? You’d never guess they’re allergen-free. The salt and baking powder balance it out—just enough to make them taste like a treat, not a compromise.
- Party in a Cup: Birthdays, potlucks, or just because—these cupcakes travel well, freeze like a dream, and even my picky nephew won’t trade them for store-bought. (Yes, even on a Tuesday night.)
- Pantry Perfection: I make a double batch and freeze half. Thaw for 10 minutes, pop in the oven, and boom—homemade cupcakes that cost less than half what the bakery charges. The xanthan gum’s the secret; it keeps them sturdy when reheated.
Step-by-step instructions for allergen-free vanilla cupcakes
Here's how to create light, airy cupcakes without gluten or dairy—fluffy enough to make you forget they're allergy-friendly!
Mix Dry Ingredients for Perfect Texture
In a medium bowl, whisk together the 1.5 cups gluten-free all-purpose flour blend, 0.5 tsp xanthan gum, 1.5 tsp baking powder, and 0.5 tsp salt. The xanthan gum is crucial here—it mimics gluten's structure to give these cupcakes that signature rise and tender crumb. Sift the mixture once to eliminate any lumps, which would otherwise create dense pockets in your cupcakes.
Real talk: Don't skip sifting. Even with gluten-free flour, those tiny lumps can make your cupcakes tough instead of fluffy. I like to use a fine-mesh sieve for this step to ensure everything's perfectly distributed. Set the dry mixture aside—it's ready to combine with the wet ingredients once they're prepped.
Combine Wet Ingredients for Smooth Batter
In a separate large bowl, whisk together the 0.5 cup melted coconut oil (let it cool slightly so it's not hot), 0.5 cup unsweetened applesauce, 0.5 cup unsweetened almond milk, 1 cup granulated sugar, 1 tbsp pure vanilla extract, and 1 tsp pure vanilla bean powder. The applesauce replaces eggs perfectly, adding moisture and structure while keeping the batter light. The coconut oil provides richness without dairy.
Mix until the sugar is completely dissolved and the mixture is smooth. Here's the thing—don't overmix. You want to combine just until everything's incorporated, about 30-45 seconds with a hand mixer. Overmixing develops gluten-like proteins in the flour, which can make your cupcakes dense rather than tender.
Gently Fold and Bake for Fluffy Results
Gradually add the dry ingredients to the wet mixture, folding with a spatula until just combined. You want to maintain as much air as possible—this is what creates those light, fluffy cupcakes. Don't overmix; stop as soon as you see no more flour streaks. The batter should be thick but pourable.
Divide the batter evenly among 12 lined cupcake pans (fill each liner about two-thirds full). Bake at 350°F for 18-22 minutes, or until a toothpick inserted comes out clean. The tops should be golden brown, and the edges should pull away slightly from the pan. I know it's tempting to open the oven early, but resist—those first 15 minutes are critical for proper rise.
Prepare Dairy-Free Buttercream
While the cupcakes cool, prepare the frosting by beating the 0.5 cup dairy-free margarine until smooth. Gradually add the 2 cups powdered sugar and 1 tsp vanilla extract, mixing on low speed until combined. This buttercream should be thick but spreadable—if it's too stiff, add 1 tsp almond milk at a time until it reaches the right consistency.
Here's where it gets fun: The key to smooth frosting is sifting the powdered sugar first. I always sift it directly into the bowl before beating to prevent any graininess. The margarine should be at room temperature when you start—if it's too cold, the frosting will be crumbly.
Frost and Decorate for Perfect Presentation
Let the cupcakes cool completely in the pan for 10 minutes, then transfer to a wire rack to cool for another 15 minutes. This gradual cooling prevents cracking. Once completely cool, pipe or spread the dairy-free buttercream onto each cupcake. For a professional look, I like to use a star tip for swirls, but a simple knife works too if you're in a hurry.
Here's the moment that matters: The frosting should create a smooth, even layer with clean edges. If you're feeling fancy, dust with powdered sugar or add sprinkles while the frosting is still slightly wet. Serve immediately or store in an airtight container for up to 3 days—though they won't last that long!
Pro Tips For Making Allergen Free Cupcake
- Mix Dry Ingredients First: The xanthan gum in your gluten-free blend needs to disperse evenly—otherwise, you’ll end up with a dense cupcake. Whisk the flour, baking powder, and salt together for a full 30 seconds before adding wet ingredients. I learned this the hard way when my first batch turned out gummy.
- Use Room-Temp Applesauce: Cold applesauce makes cupcakes tough and uneven. Let that jar sit out for 20 minutes before measuring—it blends smoother and keeps the crumb tender. (Yes, even if you’re impatient like me.)
- Fill Cups Just Right: Overfilling muffin tins leads to collapsed tops, and underfilling means dry cupcakes. Fill them to the line where the paper liner ends—no more, no less. I’ve ruined batches both ways, and this is the sweet spot.
- Bake at 350°F, Not Higher: Gluten-free batters burn faster than regular ones. Stick to 350°F and check for doneness at 12–14 minutes—insert a toothpick, but don’t overbake. I was skeptical until I tried it, and now I never go hotter.
Troubleshooting great allergen free cupcake
Dense Cupcakes Fix
If your cupcakes turn out dense instead of fluffy, the issue is likely overmixing or incorrect flour blend. First, verify your gluten-free flour has xanthan gum—this is non-negotiable for structure. If using a different brand, add an extra ¼ tsp xanthan gum to the mix. Also, ensure you're not overmixing the batter; mix just until combined (30-45 seconds max). For next time, try folding in the dry ingredients with a spatula instead of whisking. 🌾
Flat or Sunk Tops
Flat or sunken tops usually mean underbaking or opening the oven too soon. Bake at 350°F for 18-22 minutes and avoid opening the oven door during the first 15 minutes of baking. If your cupcakes sink after baking, try reducing the baking time by 1-2 minutes next time. For a quick fix, place the cooled cupcakes under a heat lamp or broiler for 10-15 seconds to crisp the tops slightly.
Cracked Frosting
Cracked frosting happens when cupcakes cool too quickly or frosting is applied too soon. Always let cupcakes cool completely in the pan for 10 minutes, then transfer to a wire rack for another 15 minutes before frosting. If the frosting cracks after applying, chill the frosted cupcakes in the fridge for 10 minutes to set the buttercream, then bring to room temperature before serving. For extra stability, use Miyoko's Creamery margarine—it whips up smoother and holds its shape better.
Dry or Crumbly Texture
Dry or crumbly cupcakes often result from overbaking or using too much flour. Double-check your baking time—18-22 minutes at 350°F is ideal. If your cupcakes still seem dry, try adding 1 tbsp almond milk to the batter for extra moisture. For future batches, ensure your coconut oil is fully melted but not hot, as residual heat can dry out the batter. Store-bought gluten-free flour blends can vary in moisture content, so adjust as needed.
Frosting Too Runny
If your buttercream is too runny, it’s likely because the margarine was too warm or you added too much almond milk. Let the margarine sit at room temperature for 30 minutes before whipping, and measure the powdered sugar carefully—2 cups sifted is the magic amount. For a quick fix, chill the frosting for 15 minutes before piping, then re-whip briefly to bring it back to the right consistency. If it’s still too thin, add 1 tbsp powdered sugar at a time until it thickens.
Uneven Rise
Uneven rise often occurs if the oven isn’t properly calibrated or the batter isn’t evenly distributed. Rotate the cupcake pan halfway through baking to ensure even heat distribution. Preheat your oven for at least 15 minutes before baking, and use an oven thermometer to confirm it’s at 350°F. If your oven runs hot, reduce the temperature by 25°F and bake for the full 22 minutes. For extra insurance, use Bob’s Red Mill 1:1 gluten-free flour blend, which bakes more consistently than other brands.
Nutrition facts
Frequently asked questions
Can I make these cupcakes nut-free?
Yes! Simply replace the unsweetened almond milk with oat milk or coconut milk to eliminate all nuts. The applesauce and coconut oil already make this recipe egg-free and dairy-free, so you'll have completely nut-free treats for those with severe allergies. Always check labels to ensure your flour blend and margarine are also nut-free.
How do I know if my gluten-free flour blend has enough xanthan gum?
Most 1:1 gluten-free flour blends contain xanthan gum, but check the label first—some premium blends include it while others sell it separately. If your package doesn't mention it, add 0.5 tsp xanthan gum per 1.5 cups flour. Without it, your cupcakes may be crumbly or dense. For extra insurance, use Bob's Red Mill 1:1 blend, which consistently includes the right amount.
Can I use this recipe for a birthday party with multiple allergies?
These cupcakes are free from the top 9 allergens (gluten, dairy, eggs, nuts, soy, fish, shellfish, sesame, and wheat). For extra safety, use certified gluten-free oats in your oat milk and verify your margarine is soy-free. The vanilla buttercream is also safe for those with dairy allergies. Just label them clearly for guests with specific concerns.
What's the best way to store these cupcakes?
Store baked (unfrosted) cupcakes in an airtight container with parchment paper between layers for up to 5 days at room temperature. For longer storage, freeze them for up to 3 months. Thaw at room temperature before frosting. The buttercream can be made 2 days ahead and refrigerated—just re-whip it briefly before using. Pro tip: Keep frosted cupcakes refrigerated for up to 3 days.
Can I add mix-ins like chocolate chips?
Yes, but choose allergen-free chocolate chips (like Enjoy Life brand) and dairy-free chocolate. Fold in ½ cup after mixing wet ingredients but before adding dry ingredients. For best results, use chips that are already dairy-free and gluten-free. Avoid adding too many mix-ins, as they can make the cupcakes dense. Start with ½ cup and adjust as needed.