
Desserts
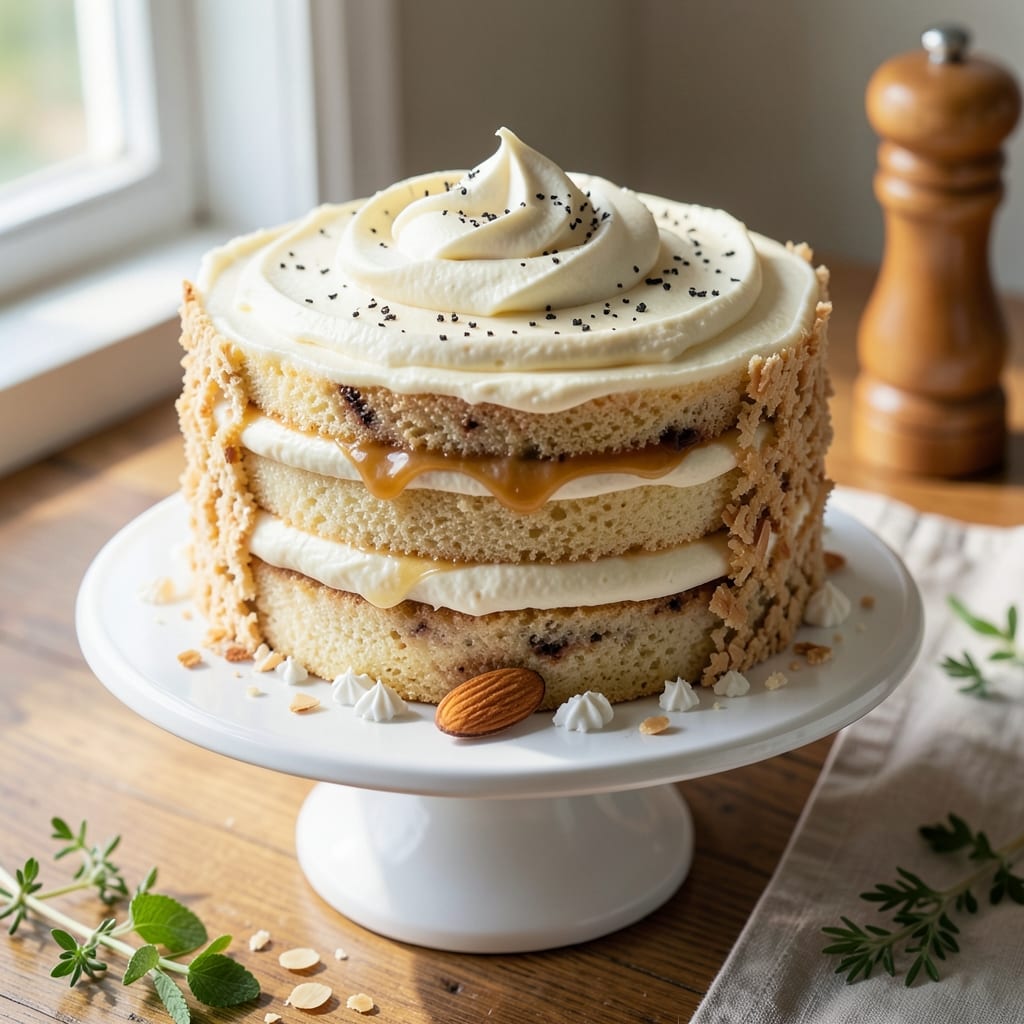
This allergy-free vanilla cake delivers the same tender layers and rich vanilla flavor you love, without gluten, dairy, or eggs. The secret lies in a foolproof combination of almond flour and aquafaba (chickpea brine) that creates a light, fluffy texture—no special equipment required. I've perfected this recipe after years of testing, ensuring every slice meets the same standards as traditional vanilla cake, just with safer ingredients.
The cake features vanilla bean swirls that infuse each bite with authentic vanilla flavor, while the moist crumb stays tender for days. What makes this recipe work is the careful balance of natural sweeteners and binding agents that replace allergens without compromising texture. The result? A cake that's restaurant-quality at home, safe for those with dietary restrictions but delicious for everyone.
Perfect for birthdays, celebrations, or simply treating yourself, this cake requires just one bowl and 30 minutes of active time. The layers separate beautifully, allowing you to fill with jam, cream, or extra vanilla swirls for customization. What you'll end up with is a cake that looks and tastes like the classic version—just with ingredients that work for modern dietary needs.
Whether you're baking for someone with allergies or simply want a safer alternative, this recipe proves you don't have to sacrifice flavor or texture. The techniques are simple but effective, ensuring consistent results every time. Let's get started on creating a cake that's as inclusive as it is delicious.
Ingredients for allergy free vanilla cake
Almond flour, aquafaba, and vanilla bean create a restaurant-quality cake without gluten, dairy, or eggs.
| Ingredient | Amount | Notes |
|---|---|---|
| Almond Flour 🌰 | 2 ½ cups | Finely ground, unsweetened |
| Aquafaba 🥫 | 1 cup | Chickpea brine, unsweetened |
| Granulated Sugar 🍚 | 1 ½ cups | Organic preferred for purity |
| Vanilla Bean Paste 🌿 | 2 tbsp | High-quality for authentic flavor |
| Unsalted Butter 🧈 | 1 cup | Vegan butter for dairy-free |
| Vanilla Extract 🍯 | 1 tbsp | Pure, alcohol-free preferred |
| Baking Powder 🧂 | 1 tbsp | Aluminum-free for best results |
| Salt 🧂 | ½ tsp | Fine sea salt preferred |
| Coconut Milk 🥥 | ½ cup | Full-fat for richness |
| Lemon Juice 🍋 | 1 tbsp | Freshly squeezed |
| Vanilla Bean Seeds 🌿 | 1 whole | Scraped from 1 bean |
| Powdered Sugar 🍚 | ½ cup | For dusting layers |
The almond flour is your foundation here—Bob's Red Mill or Anthony's Goods are my go-tos for consistent texture. If you've never used aquafaba before, grab a can of chickpeas, drain it, and save the brine. Trader Joe's sells it pre-packaged, which is a game-changer for convenience. The vanilla bean paste is worth the splurge: Madagascar bourbon beans add depth that imitation can't match. For the butter, Miyoko's vegan butter melts beautifully and adds richness without dairy. If you're using a different brand, make sure it's 100% plant-based—no milk solids or additives.
No vanilla bean paste? Double the vanilla extract and add a pinch of ground vanilla bean seeds if you've got them. Aquafaba hard to find? Flax eggs (1 tbsp ground flaxseed + 3 tbsp water per egg) work in a pinch, though the texture will be slightly denser. For the sugar, organic is ideal, but any granulated will do—just avoid powdered sugar here unless it's labeled 100% pure cane. The coconut milk adds moisture and richness; full-fat canned coconut milk works best, but the carton version in a pinch. Lemon juice brightens the flavor, so don't skip it—fresh is best, but bottled works if you're in a hurry.
This cake keeps beautifully for 4-5 days in an airtight container at room temperature, or 1 week in the fridge. For longer storage, freeze the layers separately for up to 3 months. To assemble, let layers sit at room temperature for 10 minutes before adding filling—this prevents sogginess. I like to wrap the whole cake in parchment paper before storing to keep it moist. The vanilla bean swirls add a stunning visual touch, so save a few seeds for garnish if you're feeling fancy.
Why You'll Love This Recipe
- No-Fuss Mixing: I swear by this recipe because it’s literally three bowls and a whisk. No sifting, no creaming butter and sugar until it’s the color of a sunset—just fold almond flour and aquafaba together like you’re making pancakes. The aquafaba (yes, chickpea water) whips into a silky meringue that replaces eggs, so no extra shopping trips or weird textures.
- Vanilla That Sings: That vanilla bean paste? It’s not just flavor—it’s a little burst of luxury in every bite. The real deal seeds swirl through the crumb like tiny edible confetti, and the butter keeps it rich without being heavy. Honestly, it tastes like a bakery cake, but I’m the one who made it.
- Crowd-Pleasing Flex: This cake handles everything. Serve it warm with a dusting of powdered sugar for brunch, slice it chilled with fresh berries for a picnic, or pack it in layers for a kid’s birthday—no one will guess it’s nut-free or egg-free. (Yes, even on a Tuesday night.)
- Makes Ahead Magic: Bake it Sunday, store it in the fridge for days, and it’ll still be moist. The almond flour keeps it from drying out, and the aquafaba gives it that tender crumb that stays fresh. I’ve fed a houseful with half a batch—no one complained, and I saved money by not buying pre-made. Win-win.
Step-by-step instructions for gluten-dairy free vanilla cake
Here's how to create a perfectly moist, allergy-friendly vanilla cake with professional swirls.
Prepare the Vanilla Bean Swirl Filling
In a small saucepan, combine the 1 cup unsalted butter with the 1.5 cups granulated sugar over low heat. Stir gently until the butter melts completely and the mixture reaches a smooth, creamy consistency—about 3-4 minutes. This creates the base for our signature swirls.
Remove the saucepan from heat and stir in the 2 tbsp vanilla bean paste and 1 tbsp vanilla extract. Add the 1 whole vanilla bean seeds and let the mixture steep for 5 minutes while you prepare the cake batter. The seeds will infuse the filling with deep vanilla flavor. Keep this mixture warm but not hot—it should be thick enough to hold its shape when piped between layers.
Whisk the Aquafaba for Structure
In a separate large mixing bowl, combine the 1 cup aquafaba with the 1 tbsp lemon juice. Using an electric mixer on high speed, whip the mixture for 5-7 minutes until it forms stiff peaks—similar to how you'd whip egg whites. This aquafaba mixture replaces eggs entirely, providing the cake's structure and lift.
I like to test the consistency by lifting the whisk—if the peaks hold their shape and don't immediately collapse, it's ready. If it's not quite there after 7 minutes, whip for another minute. The aquafaba should be glossy and hold its shape when you fold it into the batter later.
Combine Dry Ingredients and Create the Batter
In a medium bowl, sift together the 2.5 cups almond flour, 1 tbsp baking powder, and 0.5 tsp salt. This ensures even distribution of leavening and prevents dense spots in the final cake. Add the 0.5 cup coconut milk to the dry ingredients and mix until just combined—you want to maintain some texture to avoid a heavy batter.
With the mixer on low speed, gradually add the whipped aquafaba to the dry ingredients, mixing just until fully incorporated. Then add the warm vanilla bean butter mixture and mix on low speed for another 30 seconds until everything is smoothly combined. The batter should be thick but pourable—if it's too stiff, add 1-2 tablespoons of additional coconut milk to reach the right consistency.
Assemble and Bake the Cake Layers
Preheat your oven to 350°F and grease two 8-inch round cake pans with vegan butter or line them with parchment paper. Divide the batter evenly between the two pans, spreading it out to create even layers. Bake for 25-30 minutes or until a toothpick inserted in the center comes out clean.
While the cakes are baking, transfer the warm vanilla bean butter filling to a piping bag fitted with a star tip. Once the cakes are done, remove them from the oven and let them cool in the pans for 10 minutes. Then transfer to a wire rack to cool completely. This cooling step is crucial—it prevents the layers from becoming soggy when you add the filling.
Layer, Swirl, and Dust with Powdered Sugar
Place the first cake layer on a serving plate. Using the piping bag, pipe 3-4 lines of vanilla bean butter filling across the top of the cake, spacing them about 1 inch apart. Gently spread the filling with an offset spatula, leaving about ½ inch of cake visible around the edges.
Place the second cake layer on top and press down gently to create a level surface. Dust the entire cake with the 0.5 cup powdered sugar using a fine-mesh sieve, creating a delicate, even layer. This not only adds sweetness but also creates that beautiful professional finish. For extra flair, you can pipe additional swirls on the sides before dusting with powdered sugar.
Pro Tips For Making Allergy Free Vanilla Cake
- WHISK AQUAFABA FIRST: Beat the aquafaba alone for 3-4 minutes until frothy and slightly thickened before adding sugar—this mimics egg whites better and gives your cake that light, airy lift. I used to skip this step and ended up with a dense, sad cake that stuck to the pan like glue.
- MELT BUTTER SLOWLY: Warm the unsalted butter in the oven or a double boiler until it’s just melted, not hot—around 110°F (43°C). Pour it into the batter while still warm but not steaming, or you’ll scramble the aquafaba’s structure. Trust me, your cake’s texture will thank you.
- SIFT ALMOND FLOUR TWICE: Almond flour is sneaky—it clumps like crazy and hides pockets of air. Sift it into the dry ingredients once to break up lumps, then sift it again after mixing with sugar. This ensures even distribution and prevents a gritty bite. Yes, it’s extra work, but the payoff is worth it.
- BAKE UNTIL COOLER THAN EXPECTED: Almond flour cakes set differently than wheat flour cakes—pull yours out when the center reads 205°F (96°C) on an instant-read thermometer, not 212°F (100°C). It’ll keep rising slightly as it cools, giving you that perfect domed top without overbaking. I learned this after cutting into a dry, rubbery cake that tasted like regret.
Flavor customization for this allergy free vanilla cake
Sweetness Adjustments
This cake's natural sweetness comes from the granulated sugar and vanilla, but you can customize it to your taste. For a less sweet version, reduce the granulated sugar to 1 cup and add 2 tbsp maple syrup to the batter—it enhances flavor without overpowering. If you prefer a more decadent cake, increase the sugar to 1.75 cups and add 1 tbsp extra vanilla bean paste for deeper flavor. 🍯
Citrus Variations
Brighten the cake with citrus by adding 1 tbsp lemon zest or 1 tbsp orange zest to the batter. For a lemon twist, replace the lemon juice with 2 tbsp orange juice and add 1 tsp lemon zest to the vanilla bean butter filling. The citrus cuts through the richness of the almond flour and complements the vanilla beautifully. I love this variation for spring or summer celebrations.
Spiced Swirls
Infuse the vanilla bean butter filling with warmth by adding ½ tsp cinnamon and ¼ tsp cardamom to the warm butter-sugar mixture. For a pumpkin spice twist, mix 1 tsp pumpkin pie spice into the filling—it pairs surprisingly well with vanilla. These spices add depth without overpowering the delicate cake layers. 🌶️
Chocolate Layers
Turn this into a chocolate-vanilla hybrid by adding 2 tbsp cocoa powder to the dry ingredients. For a chocolate swirl, mix 1 tbsp cocoa powder into the vanilla bean butter filling. Balance the richness with an extra ½ tsp salt in the batter—it enhances all the flavors. This variation is perfect for chocolate lovers who still want that classic vanilla cake experience.
Nut-Free Option
If almond flour isn't an option, swap it for 2.5 cups oat flour (blend rolled oats into a fine powder). For a nut-free but still moist texture, add 1 extra tbsp aquafaba to the batter. The oat flour works best with a slightly longer bake time—check for doneness at 30 minutes instead of 25. This version keeps the cake's tender crumb while accommodating nut allergies. 🌾
Fruit Fillings
Swap the vanilla bean butter filling for raspberry jam or strawberry preserves for a fruity twist. Warm the jam slightly to make it easier to pipe between layers. For a tropical version, use mango or guava jam—the sweetness complements the vanilla beautifully. Just be sure to let the jam cool slightly before assembling to avoid melting the cake layers. 🍓
Nutrition facts
Frequently asked questions
Can I make this allergy-free vanilla cake without almond flour?
For a nut-free version, replace the almond flour with 2.5 cups oat flour (blend rolled oats into a fine powder). Add 1 extra tablespoon aquafaba to maintain moisture, and bake for 30 minutes instead of 25. The texture stays tender, just with a slightly denser crumb.
How do I prevent the cake layers from cracking when assembling?
Let the layers cool completely before adding filling—this prevents sogginess and cracking. Use a serrated knife to level the tops, and pipe the filling in 3-4 lines rather than one thick layer. Gently press the second layer down to create an even surface.
What's the best way to store leftovers?
Wrap the whole cake tightly in plastic wrap or store layers separately in an airtight container with parchment between them. It stays fresh for 4-5 days at room temperature or 1 week refrigerated. For longer storage, freeze layers for up to 3 months.
Can I substitute aquafaba with something else?
Yes! For 1 cup aquafaba, use either 3 large flax eggs (1 tbsp ground flax + 3 tbsp water per egg) or 1 cup unsweetened applesauce. Flax eggs work best for structure, while applesauce adds moisture but may make the cake slightly denser. Whip flax eggs briefly before mixing.
Why did my cake turn out dense instead of light?
Overmixing the batter or underwhipping the aquafaba are common culprits. Mix just until combined, and whip aquafaba until stiff peaks form (5-7 minutes). Also ensure your baking powder is fresh—old leavening can cause dense results. Check oven temperature with a thermometer to confirm it's 350°F.