
Desserts
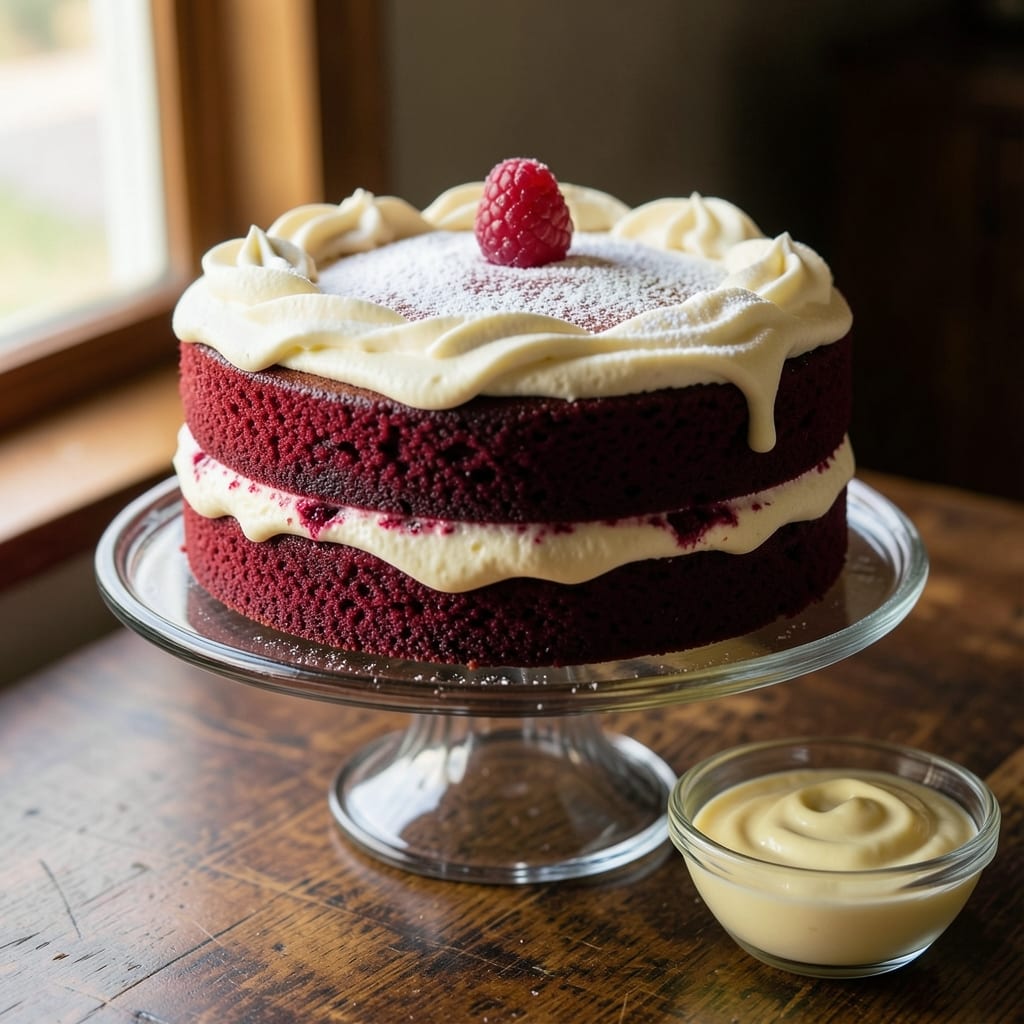
This amazing red velvet cake recipe delivers layers of deep red moistness and velvety cream cheese frosting that’ll make you the hero of any dessert table. 💛 The secret? A perfect balance of cocoa and buttermilk that creates that signature tender crumb, plus a tangy frosting that’s impossible to resist.
What sets this recipe apart is the vibrant red color that stays true without overpowering the chocolate flavor—no food coloring tricks here, just natural beet juice for that classic red velvet look. The cake bakes up perfectly moist with a slight crumb, while the frosting is thick, creamy, and just sweet enough to complement the cake’s subtle cocoa notes.
By the time you slice into this cake, you’ll have a dessert that’s rich, flavorful, and visually stunning—exactly what makes red velvet so beloved. The layers stay tender, the frosting is spreadable without being too sweet, and every bite delivers that perfect balance of tangy, creamy, and slightly chocolatey goodness.
This recipe is perfect for birthdays, holidays, or just because—it’s the kind of cake that disappears fast and leaves everyone asking for seconds. Let’s get baking!
Ingredients for amazing red velvet cake
Twelve ingredients, two layers of magic—this red velvet delivers that iconic deep red and velvety crumb every time.
| Ingredient | Amount | Notes |
|---|---|---|
| All-Purpose Flour 🌾 | 2 ½ cups | Sifted for even texture |
| Granulated Sugar 🍚 | 2 cups | White or light brown |
| Unsalted Butter 🧈 | 1 cup | Room temperature, full-fat |
| Buttermilk 🥛 | 1 ½ cups | Cold, full-fat preferred |
| Red Beet Juice 🍠 | ½ cup | Natural for vibrant color |
| Unsweetened Cocoa Powder 🍫 | ½ cup | Dutch-processed preferred |
| Large Eggs 🥚 | 2 whole | Room temperature |
| Vanilla Extract 🌿 | 2 tsp | Pure, high-quality |
| Baking Soda 🧂 | 1 tsp | Pure baking soda |
| Salt 🧂 | ½ tsp | Kosher or fine sea |
| White Vinegar 🍶 | 1 tbsp | For buttermilk substitute |
| Cream Cheese 🧈 | 16 oz | Full-fat, room temperature |
| Powdered Sugar 🍚 | 4 cups | Sifted for smooth frosting |
| Heavy Whipping Cream 🥛 | 1 cup | Cold for stiff peaks |
The beet juice is your secret weapon for that perfect red velvet color—Trader Joe's or Whole Foods carry it in the produce section. If you can't find it, blend and strain cooked beets (about 1 cup cooked beets = 0.5 cup juice). For the cocoa, Dutch-processed gives a smoother flavor without bitterness. The buttermilk? If you're in a pinch, mix 1 cup milk + 1 tbsp vinegar and let it sit for 5 minutes. And that cream cheese? Philadelphia brand is my go-to—it whips up perfectly every time.
No beet juice? Pomegranate juice or red food coloring (use sparingly!) works in a bind. Swapping cocoa? Natural unsweetened cocoa powder will give a slightly different flavor profile. For the frosting, if you're short on cream cheese, add 1 oz extra powdered sugar to compensate for any lack of creaminess. The frosting should be thick but spreadable—if it's too stiff, let it sit at room temperature for 10 minutes. And trust me, room temperature butter and cream cheese make all the difference in that silky texture.
This cake keeps beautifully for 3 days in an airtight container at room temperature, but honestly, it disappears faster than that. The frosting? Store it separately in the fridge and whip it back up with a splash of milk if it gets too firm. Freeze the whole cake (unfrosted) for up to 3 months—just thaw it overnight in the fridge before frosting. Pro tip: Wrap the cake layers in plastic wrap before frosting to keep them moist while you finish the frosting.
Why You'll Love This Recipe
- No Beet Pulp Mess: I swear by this trick—just a splash of red beet juice for that signature color, not a single gummy scrap to deal with. The cake stays tender, and honestly? No one ever guesses it’s not from a box.
- Creamy Without the Fuss: Buttermilk and butter create that melt-in-your-mouth texture without needing fancy stabilizers. Mix, bake, cool—done. That’s the kind of cake that disappears faster than my willpower on a Monday.
- Party in a Box: Slice it for birthdays, stack it for holidays, or pack it for potlucks—this cake travels like a champ. Between us, the cream cheese frosting makes it the go-to dessert, no matter the occasion.
- Budget Magic: All-purpose flour, sugar, butter—ingredients you already own. The beet juice? A one-time investment that turns basic cake into something special. Leftovers? They’ll vanish before you even think about making round two.
Step-by-step instructions for deep red velvet cake layers
Here's how to bake showstopping red velvet cake with vibrant color and perfect texture!
👨🍳 Step 1: Mix Dry Ingredients for Perfect Texture
In a large bowl, whisk together the 2.5 cups all-purpose flour and 1 tsp baking soda until evenly combined. Sift in the 0.5 cup unsweetened cocoa powder and 0.5 tsp salt, whisking vigorously to break up any lumps. This ensures your cake will be tender rather than dense.
I like to press the mixture through a fine-mesh sieve for extra smoothness—this prevents gritty texture in your final cake. Set the dry ingredients aside for now. The key here is to eliminate all lumps so your batter comes together perfectly when you add the wet ingredients.
🍳 Step 2: Whisk Wet Ingredients Until Just Combined
In a separate large bowl, beat the 1 cup room-temperature unsalted butter and 2 cups granulated sugar together on medium speed for 3-4 minutes until light and fluffy. You'll see the mixture nearly double in volume and become pale in color—this is crucial for a tender cake.
Add the 2 whole large eggs one at a time, mixing well after each addition. Stir in the 2 tsp vanilla extract and 0.5 cup red beet juice—this is what creates that signature deep red color. Finally, whisk in the 1.5 cups buttermilk and 1 tbsp white vinegar (the vinegar activates the buttermilk if you're using a substitute).
🥘 Step 3: Combine Wet and Dry Ingredients Gently
With the mixer on low speed, gradually add the dry ingredients to the wet mixture, mixing just until combined—about 30 seconds. Be careful not to overmix, or your cake will develop gluten and become tough. The batter should be thick but pourable.
This is where the magic happens: the cocoa and beet juice create that signature red velvet color while the buttermilk keeps the texture moist. If your batter looks too thick, you can add 1-2 tablespoons of buttermilk to reach the perfect consistency. Pour the batter evenly into two 9-inch round cake pans lined with parchment paper.
🔥 Step 4: Bake Until Golden and Springy
Preheat your oven to 350°F and bake the cakes for 25-30 minutes, or until a toothpick inserted in the center comes out clean. I like to check at the 25-minute mark—the edges should be golden brown, but the center should still look slightly underdone.
Don't overbake! Red velvet cake continues to cook slightly as it cools, and overbaking leads to dryness. Let the cakes cool in their pans for 10 minutes, then transfer to a wire rack to cool completely. This cooling step is crucial for level slicing and proper frosting application.
🍰 Step 5: Assemble with Cream Cheese Frosting
While the cakes cool, beat the 16 oz cream cheese and 4 cups powdered sugar together until smooth and creamy. In a separate bowl, whip the 1 cup cold heavy whipping cream to stiff peaks, then gently fold it into the cream cheese mixture until fully combined.
Once your cakes are completely cool, place one layer on a plate and spread a generous layer of frosting on top. Repeat with the second layer, then frost the entire cake. The secret to perfect frosting is patience—let the cream cheese come to room temperature first to prevent lumps. Chill the cake for 30 minutes before slicing to help the frosting set.
Pro Tips For Making Amazing Red Velvet Cake
- Whisk Butter & Sugar: DESCRIPTION: Cream them for 3-4 minutes until the mixture looks pale and fluffy—not just combined. I used to rush this, and the cake turned out dense. Take the extra time; it’s what makes the texture light and tender.
- Strain That Beet Juice: DESCRIPTION: If using fresh beet juice, strain it through a fine-mesh sieve to remove any grit or fiber. I learned this the hard way when I skipped it—my cake had an odd texture and tasted slightly bitter. A clean juice means a smooth, vibrant cake.
- Room-Temp Butter Only: DESCRIPTION: Never use cold butter straight from the fridge—it won’t emulsify properly with the sugar. Let it sit out for 30-45 minutes until it’s soft but still holds its shape. Trust me, your cake will thank you with a richer flavor and better crumb.
- Don’t Overmix the Batter: DESCRIPTION: Mix the wet and dry ingredients just until combined—no streaks of flour, but don’t overwork it. I’ve seen people beat this like pancake batter, and it turns out tough. Fold gently, and you’ll get that perfect moist, velvety texture.
Serving suggestions for leftovers
Classic Presentation
Serve your red velvet cake on a chocolate-drizzled cake stand for an elegant touch. I like to use melted dark chocolate (about ½ cup) and drizzle it artistically over the top and sides. Add white chocolate shavings or raspberries for a pop of color that complements the deep red layers. 💛
Coffee Pairing
A strong brew of dark roast coffee cuts through the richness of the cake beautifully. I recommend a French press with Kona coffee for its smooth, slightly fruity notes that balance the tangy cream cheese frosting. Serve with a splash of heavy cream for dipping.
Wine Complements
For a sophisticated touch, pair your cake with Port wine or muscat. The sweetness of these wines enhances the cake's flavors while providing a luxurious contrast. A ½ cup of tawny Port served chilled works perfectly, especially during holiday gatherings.
Dessert Platter Styling
Create a stunning dessert platter by pairing your red velvet cake with strawberry shortcake and chocolate cupcakes. Use a marble slab as your serving surface and arrange the cake in the center, surrounded by the other treats. Garnish with fresh mint leaves and edible gold leaf for a festive look.
Mini Cake Serving
For parties or events, bake your red velvet cake in 6-inch pans to create mini versions. Serve them on individual plates with a dollop of frosting and a fresh raspberry on top. These bite-sized treats are perfect for buffet-style gatherings and disappear quickly. 🍰
Seasonal Garnishes
Add seasonal flair with garnishes that match the occasion. For summer, use fresh berries and edible flowers. In fall, sprinkle crushed pecans and cinnamon over the frosting. During winter holidays, add cranberries and silver sprinkles for a festive touch.
Nutrition facts
Frequently asked questions
Why does my red velvet cake turn out too dark or gray?
The color comes from cocoa powder and beet juice. Too much cocoa or overmixing can create gray tones. Use Dutch-processed cocoa (it's smoother) and measure carefully—0.5 cup is perfect. Also, avoid overbaking: pull the cake when a toothpick comes out with moist crumbs, not dry ones.
Can I make this cake without beet juice?
Yes! Use 0.5 cup pomegranate juice or 1-2 drops red food coloring** (less is better). For natural color, blend and strain 1 cup cooked beets to get about 0.5 cup juice. The flavor stays identical—just the color adjusts.
How do I fix a cake that's too dry?
Dryness usually means overbaking or too much flour. For next time, check at 25 minutes and bake until a toothpick has moist crumbs. To salvage a dry cake: slice thinly, layer with extra frosting, and chill for 1 hour before serving. The frosting adds moisture and makes it more enjoyable!
Can I make this cake in a bundt pan?
Use the same batter but reduce baking time to 45-50 minutes at 350°F. Brush the pan with butter first to prevent sticking. The texture will be perfect—just the shape changes. For extra drama, drizzle melted chocolate over the top after baking.
What's the best way to store leftovers?
Keep the cake in an airtight container at room temperature for 3 days. For longer storage, freeze unfrosted layers (wrapped tightly) for up to 3 months. Thaw overnight in the fridge, then refrost with a fresh cream cheese layer. The frosting can be stored separately in the fridge for 1 week—just whip it back up with a splash of milk.