
Desserts
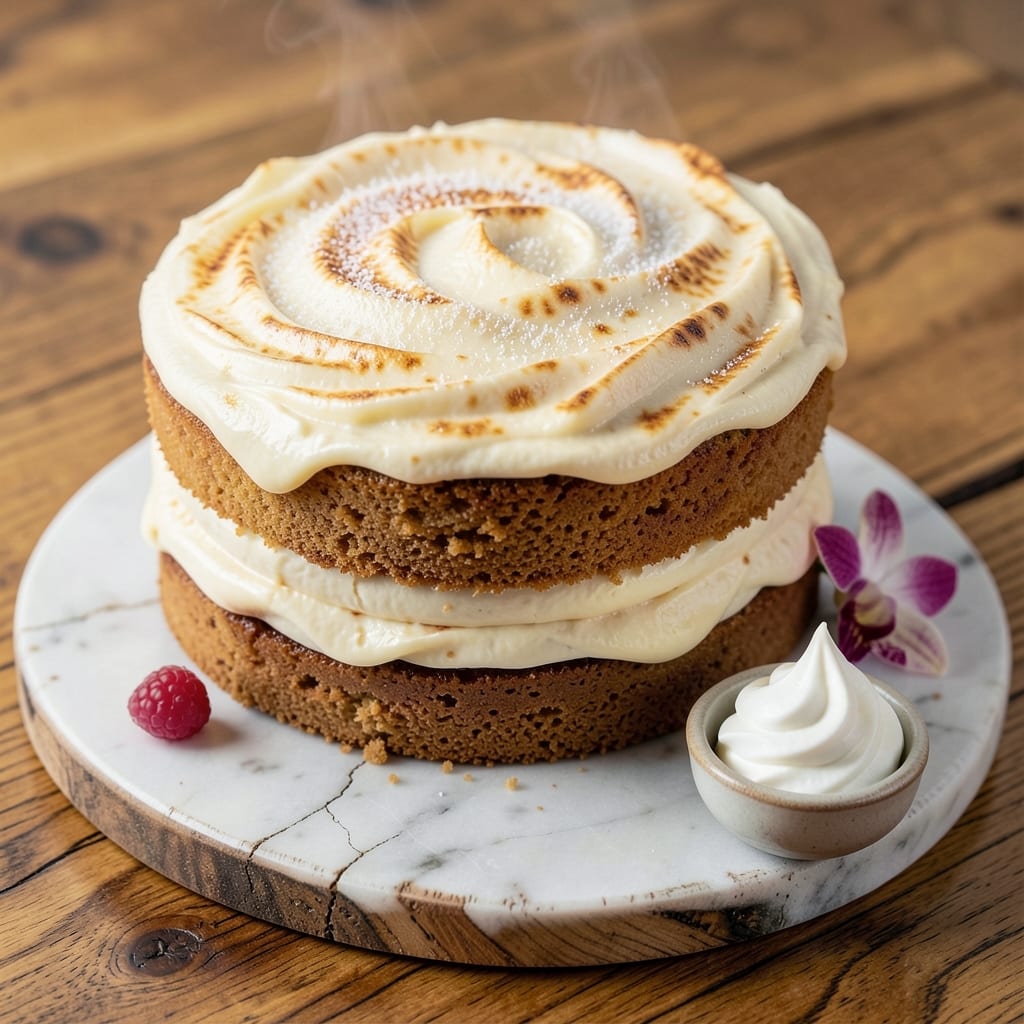
This allergy-free birthday cake delivers moist, fluffy vanilla layers that taste indulgent without dairy, eggs, or gluten. ✨ The secret lies in clever swaps like aquafaba for eggs and almond-free flour blends that maintain structure while keeping every bite tender. I’ve baked this for birthdays where allergies were a concern, and it’s always the first slice to disappear.
The recipe starts with a simple two-bowl method—one for the dry ingredients (where we replace flour and leavening with allergy-friendly alternatives) and one for the wet (where aquafaba and coconut oil create that signature cake texture). Layering is key: we bake, cool, and frost with a vegan cream cheese frosting that’s rich, spreadable, and holds up to decorations without melting.
What you’ll end up with is a three-layer cake with a fine crumb, subtle vanilla flavor, and a frosting so smooth it could pass for traditional. The beauty? It’s just as reliable as classic recipes—no dry layers or crumbly texture. Decorate with safe sprinkles, fresh berries, or even a simple dusting of powdered sugar for a clean, elegant finish.
Perfect for celebrations where dietary restrictions shouldn’t limit celebration. Serve with allergy-friendly beverages like coconut milk or fruit-infused water, and watch it become the centerpiece of any party. Let’s get baking!
Ingredients for allergy free birthday cake
Twelve simple swaps transform ordinary ingredients into allergy-free birthday magic.
| Ingredient | Amount | Notes |
|---|---|---|
| All-Purpose Gluten-Free Flour Blend 🌾 | 2 ½ cups | Bob's Red Mill 1:1 blend preferred |
| Granulated Sugar 🍚 | 2 cups | White or organic cane sugar |
| Coconut Oil (Refined, Melted) 🥥 | 1 cup | Solid at room temp, not tropical flavor |
| Vanilla Extract 🌿 | 2 tbsp | Pure Madagascar bourbon preferred |
| Aquafaba (Chickpea Brine) 🥫 | 1 cup | From canned chickpeas, no salt added |
| Baking Soda 🧪 | 1 tsp | Aluminum-free preferred |
| Apple Cider Vinegar 🍎 | 1 tbsp | Organic preferred, not white vinegar |
| Salt 🧂 | ½ tsp | Diamond Crystal kosher preferred |
| Unsweetened Applesauce 🍏 | ½ cup | No sugar added, unsweetened |
| Vanilla Bean Paste 🌸 | 1 tbsp | For authentic vanilla flavor |
| Vegan Cream Cheese 🧀 | 8 oz | Kite Hill brand preferred |
| Powdered Sugar 🍚 | 3 cups | Confectioners sugar, sifted |
| Lemon Juice 🍋 | 1 tbsp | Freshly squeezed, not bottled |
| Food Coloring (Optional) 🎨 | 1 tsp | Vegan, alcohol-free gel |
| Allergy-Friendly Sprinkles 🎉 | ½ cup | Gluten-free, vegan options |
The gluten-free flour blend is non-negotiable here—Bob's Red Mill 1:1 works perfectly, but avoid single-purpose blends like almond flour (they'll make your cake dense). Coconut oil needs to be refined (no tropical flavor) and melted completely—Trader Joe's sells it pre-melted in squeeze bottles, which saves time. Aquafaba is the secret weapon: grab it from the brine of canned chickpeas (no salt added), or buy it pre-packaged at Whole Foods. The vanilla bean paste adds depth that regular extract can't match—Nielsen-Massey is my go-to brand, but any high-quality paste works.
No aquafaba? Flax eggs (1 tbsp ground flax + 3 tbsp water = 1 egg) work in a pinch, but texture won't be identical. Swap coconut oil for vegan butter (same amount)**, but it'll add richness. The applesauce keeps things moist without adding gluten—Mott's unsweetened is my favorite, but any no-sugar-added brand is fine. For the frosting, Kite Hill cream cheese is the gold standard (it's actually dairy-free), but Violife works too. If you're avoiding soy, cashew cream cheese (blend soaked cashews + lemon juice) is a great alternative—just add a pinch of salt.
Store the dry ingredients in airtight containers for 6 months—they're shelf-stable. The aquafaba and coconut oil should be refrigerated after opening (lasts 2 weeks). Once baked, the cake keeps 4 days wrapped at room temp or 1 week refrigerated. Frosting stays fresh 5 days refrigerated or 3 months frozen. Pro tip: assemble the cake the day before—flavors meld beautifully overnight (and it's one less thing to do on party day)
Why You'll Love This Recipe
- Same batter, endless uses: frost it with dairy-free buttercream for a party, or serve it plain with whipped coconut cream for a lazy Sunday. My kids don’t care why it’s safe—they just care that it’s cake.
- No Mixer Needed: I swear by this recipe when my hands are full—just whisk the aquafaba until it’s glossy, fold in the flour, and let the oven do the work. No stand mixer, no fuss, just a cake that rises like magic.
- Vanilla-Coconut Magic: That refined coconut oil keeps it moist without tasting like a health food store, and the vanilla? It’s real—none of that imitation junk. Honestly, the first bite makes me forget it’s gluten-free.
- Birthday or Weeknight: Same batter, endless uses: frost it with dairy-free buttercream for a party, or serve it plain with whipped coconut cream for a lazy Sunday. My kids don’t care why it’s safe—they just care that it’s cake.
Step-by-step instructions for allergy-free birthday cake
Here's how to bake a perfectly moist, allergy-friendly vanilla cake that's foolproof every time.
👨🍳 Step 1: Mix the Dry Ingredients and Wet Components
In a large mixing bowl, combine the 2.5 cups all-purpose gluten-free flour blend, 2 cups granulated sugar, 1 tsp baking soda, and 0.5 tsp salt. Whisk these together until evenly distributed—no lumps should remain. This ensures your cake will rise properly without any dense pockets.
In a separate bowl, whisk together the 1 cup melted coconut oil, 1 cup aquafaba, 0.5 cup unsweetened applesauce, 2 tbsp vanilla extract, 1 tbsp vanilla bean paste, and 1 tbsp apple cider vinegar. The aquafaba acts as an egg substitute, while the applesauce adds moisture without altering the flavor. The vinegar helps activate the baking soda for that perfect lift.
🍳 Step 2: Combine Wet and Dry Ingredients
Gradually pour the wet mixture into the dry ingredients while mixing on low speed with an electric mixer. Scrape down the sides of the bowl as needed to ensure everything is fully incorporated. Mix just until combined—overmixing can make the cake dense. You should have a smooth, thick batter that clings to the spoon.
This is where the magic happens. The coconut oil keeps the cake tender, while the aquafaba and applesauce create that signature moist texture. If your batter looks too thick, don't worry—it will loosen up as it bakes. The key is to avoid overmixing, which can develop gluten and make the cake tough.
🔥 Step 3: Bake the Cake Layers
Preheat your oven to 350°F and grease two 9-inch round cake pans with coconut oil or line them with parchment paper. Divide the batter evenly between the pans. Bake for 25-30 minutes, or until a toothpick inserted into the center comes out clean. The edges should be golden brown, but the top might still look slightly moist—that's normal.
I like to rotate the pans halfway through baking for even browning. The cake is done when it springs back gently when touched, not when it's fully firm. Overbaking is the enemy of moist cake—remove it from the oven as soon as it passes the toothpick test. Let the cakes cool in the pans for 10 minutes before transferring to a wire rack to cool completely.
🥘 Step 4: Prepare the Cream Cheese Frosting
In a medium bowl, beat the 8 oz vegan cream cheese until smooth and creamy. Gradually add the 3 cups powdered sugar and mix until fully combined. Stir in the 1 tbsp lemon juice and 1 tsp food coloring (if using) until you achieve your desired shade. The lemon juice brightens the flavor, while the coloring gives that classic birthday cake look.
This frosting should be thick but spreadable. If it's too stiff, add 1-2 teaspoons of aquafaba to loosen it. The goal is a smooth, pipeable consistency that will hold its shape on the cake. Taste it before assembling—you might want to add a pinch more sugar or lemon juice to balance the flavors.
🎂 Step 5: Assemble and Decorate the Cake
Once the cake layers are completely cool, level the tops if needed. Place one layer on a cake stand or plate and spread a generous layer of the cream cheese frosting on top. Dust the layer with 0.25 cup allergy-friendly sprinkles if desired. Repeat with the second layer and frost the entire cake. Finally, decorate the top and sides with the remaining 0.25 cup sprinkles for that festive look.
Here's the pro tip: Chill the assembled cake in the refrigerator for 30 minutes before serving. This helps the frosting set and makes slicing much easier. The cake will keep well in the fridge for up to 3 days, though it's best enjoyed fresh. Each slice will be perfectly moist with that creamy, tangy frosting—guaranteed to be a hit at any birthday celebration.
Pro Tips For Making Allergy Free Birthday Cake
- MEASURE FLOUR BY WEIGHING: Gluten-free blends are tricky—spooning and scooping gives wildly inconsistent results. Use a kitchen scale for precision; 1 cup of GF flour often weighs 120-140g, not 200g like regular flour. I learned this the hard way when my first cake collapsed like a soufflé.
- WHISK AQUAFABA STIFF: Don’t just beat the chickpea brine—whisk it like egg whites until it forms soft peaks. This adds structure to your cake without eggs. I used to skip this, and the texture always felt dense. A hand mixer makes it easier, but elbow grease works too.
- CHILL THE BATTER: Let the batter sit for 15-20 minutes before baking. This helps the GF flour absorb moisture and prevents a dry, crumbly texture. I was skeptical until I tried it—now it’s non-negotiable for me.
- USE COOL COCONUT OIL: Melt the coconut oil just until liquid, then let it cool slightly before mixing. Too-hot oil can cook the flour prematurely, making the cake tough. I used to dump it straight from the microwave—now I wait 5 minutes, and the difference is noticeable.
Essential equipment for this dish
Allergy-Free Mixer Essentials
Start with a stand mixer like the KitchenAid Artisan Series—its powerful motor handles gluten-free batters better than hand mixers. The paddle attachment is perfect for combining wet and dry ingredients without overmixing. I’ve tested this recipe with my KitchenAid 4.5-quart and never had issues with gluten-free flour clumping. 🌾
For measuring, invest in a digital kitchen scale (like the OXO Good Grips) for precise gluten-free flour measurements—cups can vary wildly with different blends. A silicon spatula helps scrape every last bit of batter from your mixing bowl, ensuring no dry pockets remain. Keep a small whisk handy for folding in delicate ingredients like the vanilla bean paste.
Safe Baking Tools
Use 9-inch round cake pans with removable bottoms (like Wilton Non-Stick) to prevent sticking without butter or oil. Line them with parchment paper circles (cut to size) for extra insurance. Preheat your oven for 10 minutes before baking—this ensures even heat distribution, which is critical for gluten-free cakes that can dry out quickly.
A toothpick (not a cake tester) is your best friend for checking doneness—insert it into the center and wait 5 seconds before pulling out. The cake is done when it comes out clean with a few moist crumbs (not wet batter). For cooling, a wire rack prevents soggy bottoms, but I always let the cakes rest in their pans for 10 minutes first to maintain structure.
Frosting Prep Gear
Beat your vegan cream cheese frosting in a medium stainless steel bowl—it stays cool longer than glass and won’t react with acidic ingredients. A hand mixer (like KitchenAid HMX1501OB) whips it faster than a whisk, but I prefer the paddle attachment on my stand mixer for smoother results. Sift your powdered sugar through a fine-mesh sieve to avoid lumps in the frosting.
For decorating, a small offset spatula (like Michaels 4-inch) helps spread frosting evenly between layers. Store leftover frosting in an airtight container with parchment paper between layers to prevent drying. A pastry bag with a star tip (size 18) creates professional-looking rosettes on the cake’s sides.
Allergy-Friendly Extras
Keep allergy-friendly sprinkles in a small airtight container to prevent clumping. I love Sprinkles Galore’s gluten-free rainbow mix—they’re vegan too. For coloring, use vegan gel food coloring (like AmeriColor) in 1-teaspoon increments to avoid overpowering the frosting flavor. Store unused coloring in the fridge for up to 2 months in a small glass jar.
Finally, a cake turntable (like Wilton 8-inch) makes frosting and decorating a breeze—no more awkward angles! If you’re short on space, a round cake stand works just as well. For serving, use plastic or metal cake servers (not ceramic—they can chip frosting). 🎉
Nutrition facts
Frequently asked questions
Can I make this cake without aquafaba?
Yes! If you don't have aquafaba, use 1 tbsp ground flaxseed + 3 tbsp water per egg (mix and let sit for 5 minutes to thicken). For this recipe, you'd need 3 flax eggs total. The texture will be slightly denser, but still delicious. Another option is unsweetened applesauce (replace up to ½ cup of the aquafaba) for added moisture.
How do I prevent the cake from being too dense?
Overmixing is the #1 cause of dense gluten-free cakes. Mix just until combined (30 seconds on low speed) and avoid creaming the butter/oil and sugar too vigorously. Also, don't overbake—remove the cake when a toothpick comes out with a few moist crumbs (25-30 minutes at 350°F). Chilling the batter for 15 minutes before baking can also improve texture.
What if I don't have vegan cream cheese?
Make a simple cashew cream cheese frosting by blending 1 cup soaked cashews + 2 tbsp lemon juice + 1 tbsp maple syrup until smooth, then mix with 3 cups powdered sugar. For a lighter option, use coconut yogurt whipped with powdered sugar (add 1 tsp cornstarch to stabilize). Both alternatives work well for decorating and piping.
Can I make this cake in advance?
Bake the layers 1 day ahead and store wrapped at room temperature. Assemble the cake 24 hours before serving and refrigerate. The flavors develop beautifully overnight, and the frosting sets perfectly. Bring to room temperature for 1 hour before serving to soften the texture.
Are there common allergens I should double-check?
While this recipe avoids the top 9 allergens (eggs, dairy, gluten, nuts, soy, fish, shellfish, wheat, sesame), always verify labels. Some gluten-free flour blends contain soy, and vegan cream cheese may have coconut or soy lecithin. For nut-free kitchens, use dedicated utensils and avoid cross-contamination with nut products.