
Desserts
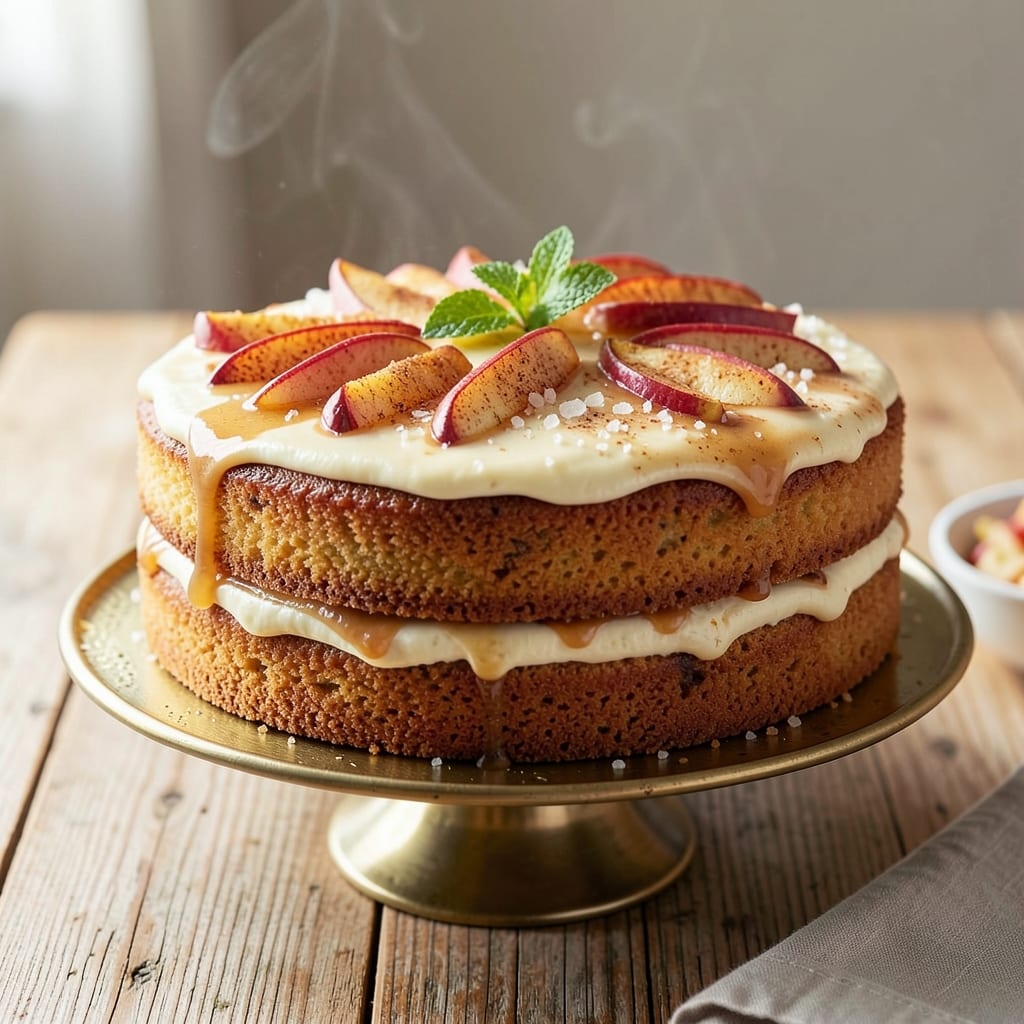
This amazing apple cake recipe delivers layers of spiced moistness with a caramelized top that’ll make your kitchen smell like autumn. 🍏 I’ve perfected the balance between tender crumb and buttery richness, with a secret trick for keeping the apples juicy—not soggy—throughout. The magic happens in the filling, where sautéed apples release their natural sweetness while cinnamon and nutmeg work their warmth. What sets this cake apart is the moist texture that stays soft for days, thanks to a simple trick: mixing the dry ingredients separately from the wet. The caramelized top forms a beautiful golden crust while keeping the inside fluffy, and you can customize it with streusel topping or a glaze. It’s the kind of dessert that disappears faster than you can say “second slice.” The best part? This cake tastes even better the next day, making it perfect for meal prep or gifting. Serve it warm with vanilla ice cream or whipped cream, and watch everyone ask for the recipe. Let’s bake something unforgettable—your taste buds will thank you.
Fair warning: once you try this version, store-bought apple cake won’t cut it. The spiced filling—made with a mix of tart and sweet apples—creates pockets of juicy goodness in every bite, while the buttery crust holds up beautifully. I’ve tested this recipe with both raw and sautéed apples, and the sautéed method gives you that restaurant-quality depth without extra effort.
Whether you’re baking for a family gathering or treating yourself to a cozy weekend dessert, this apple cake delivers restaurant-quality results at home. The secret? Patience in the baking process and a little extra love in the filling. Trust me, the first bite is worth every minute of waiting.
For extra flair, top with a simple powdered sugar dusting or a drizzle of caramel sauce. The possibilities are endless, but this classic version always steals the show. Let’s get baking!
Ingredients for amazing apple cake
These simple yet transformative ingredients create a cake that tastes like autumn in every bite.
| Ingredient | Amount | Notes |
|---|---|---|
| All-Purpose Flour 🌾 | 2 ½ cups | Sifted for light texture |
| Granulated Sugar 🍚 | 1 ½ cups | White or light brown |
| Light Brown Sugar 🍚 | ½ cup | Packed, for moisture |
| Unsalted Butter 🧈 | 1 cup | Cold, cubed for mixing |
| Large Eggs 🥚 | 2 whole | Room temperature preferred |
| Vanilla Extract 🍯 | 1 tbsp | Pure extract for flavor |
| Baking Powder 🧂 | 2 tsp | Freshly measured |
| Ground Cinnamon 🌿 | 2 tsp | Freshly ground preferred |
| Ground Nutmeg 🌿 | ½ tsp | Freshly grated for warmth |
| Salt 🧂 | ½ tsp | Fine sea salt preferred |
| Apples 🍏 | 4 medium | Tart and sweet mix (e.g., Honeycrisp + Granny Smith) |
| Lemon Juice 🍋 | 1 tbsp | Freshly squeezed for brightness |
| Powdered Sugar 🍚 | ½ cup | For optional caramelized top |
The apples are the heart of this cake—don’t skimp on quality. Local orchards or grocery store pre-washed apples work best, but avoid pre-sliced bags (they oxidize fast). I always grab a mix of tart (Granny Smith) and sweet (Honeycrisp) for balance. Walmart’s Great Value brand or Trader Joe’s organic apples are my go-tos—they hold up well during baking. For extra flavor, toss them with a pinch of cinnamon before sautéing, but don’t overcook them or they’ll turn mushy. The butter matters too—use Land O’Lakes or Plugrá for reliable flavor, and keep it cold when creaming to avoid a greasy texture.
No vanilla extract? Vanilla bean paste or even a scraped vanilla bean work in a pinch. Short on powdered sugar for the top? Granulated sugar mixed with 1 tsp cornstarch does the trick. The spices are non-negotiable though—Penzeys brand cinnamon and nutmeg add depth, but regular grocery store spices work fine if they’re fresh. For the filling, if you can’t find tart apples, add 1 tsp lemon juice to sweet varieties to balance the flavor. And if you’re feeling fancy, swap half the apples for pears or plums—just reduce the lemon juice to 1 tsp.
This cake keeps beautifully—3-4 days at room temperature wrapped in foil, or 1 week in the fridge. For longer storage, freeze the whole cake (unfrosted) for up to 3 months. I always bake mine the night before so the flavors meld overnight. The caramelized top? Brush with melted butter right after baking for extra richness. Leftovers? Reheat slices in the microwave for 15 seconds—just enough to warm the filling without drying the crust.
Why You'll Love This Recipe
- No Mixer Needed: I swear by this recipe when I’m in a rush—just cream the butter and sugars by hand (or use a fork in a pinch), fold in the flour, and let the apples do the work. The eggs bind it all together without fuss, and the cake rises beautifully even if I don’t measure the flour to the gram.
- Butter-Sugar Magic: That combo of granulated and brown sugar? It’s the secret weapon—crisp edges from the brown sugar’s caramelization, tender crumb from the granulated, and the butter? It keeps every slice moist without tasting heavy. Honestly, I’ve tried fancier cakes, but this one always wins my taste test.
- Weeknight Crowd-Pleaser: Between us, this is my go-to for school events, potlucks, or when my book club shows up unannounced. The apples add natural sweetness, so I can cut back on sugar if needed, and it reheats like a dream—perfect for those “I made too much” moments.
- Leftovers That Last: I bake a full sheet pan on Sunday, and it’s still moist by Wednesday. The flour-butter base stays fresh longer than most cakes, and the apples? They don’t turn mushy. (Yes, even on a Tuesday night.) Plus, it’s budget-friendly—no specialty ingredients, just pantry staples.
Step-by-step instructions for spiced apple cake
Here's how to create a tender, spiced apple cake with that perfect caramelized top.
👨🍳 Step 1: Prepare the Apples and Dry Ingredients
Start by peeling and coring the 4 medium apples, then slice them into ¼-inch thick rounds. Toss the apple slices with 1 tablespoon lemon juice to prevent browning and preserve their freshness. Set aside in a bowl.
In a medium bowl, whisk together the 2.5 cups all-purpose flour, 2 teaspoons baking powder, 2 teaspoons ground cinnamon, ½ teaspoon ground nutmeg, and ½ teaspoon salt. Sifting the flour first ensures a light, airy texture for your cake. I like to use a fine-mesh sieve for this step—it removes lumps and incorporates air, which helps create that perfect crumb.
🍳 Step 2: Cream Butter and Sugars
In a large mixing bowl, combine the 1 cup unsalted butter (cold, cubed) with the 1.5 cups granulated sugar and ½ cup light brown sugar. Using a stand mixer or hand mixer, beat on medium speed for 3-4 minutes until the mixture is light and fluffy. You'll see it nearly double in volume and become pale in color—this is how you know you've incorporated enough air.
This creaming process is crucial for a tender cake. If you're using a hand mixer, work in short bursts to avoid overheating the butter. The butter should be soft enough to beat but not melted—this ensures proper emulsification with the sugars.
👨🍳 Step 3: Add Eggs and Vanilla
Add the 2 whole large eggs, one at a time, mixing on low speed for 30 seconds after each addition. Scrape down the sides of the bowl to ensure everything is fully incorporated. Then, add the 1 tablespoon vanilla extract and mix for another 10 seconds. The mixture should be smooth and slightly thickened.
Here's where it gets fun—toss in the prepared apples and gently fold them into the batter using a silicone spatula. You want to distribute them evenly without overmixing. The apples should be mostly submerged in the batter, but a few can peek through for that classic apple cake look.
🥘 Step 4: Combine Wet and Dry Ingredients
Gradually add the dry ingredient mixture to the wet ingredients in three parts, mixing on low speed just until combined after each addition. Be careful not to overmix—stop as soon as the flour disappears. Overmixing develops gluten, which can make your cake tough instead of tender.
Once combined, fold in the remaining apples if needed. The batter will be thick and slightly sticky, but that's perfect. Don't worry if it looks uneven—this is normal for a moist, flavorful cake.
🔥 Step 5: Bake and Create the Caramelized Top
Preheat your oven to 350°F and grease an 8-inch round cake pan or line it with parchment paper. Pour the batter into the prepared pan and smooth the top with a spatula. Sprinkle the ½ cup powdered sugar evenly over the top of the cake—this will create that beautiful caramelized crust.
Bake for 45-50 minutes until a toothpick inserted into the center comes out clean. The edges should be golden brown, and the top should have a glossy, caramelized sheen from the powdered sugar. If the top browns too quickly, tent the cake with aluminum foil to prevent over-browning.
Once baked, let the cake cool in the pan for 10 minutes, then transfer it to a wire rack to cool completely. The cake will be moist and tender with a perfect balance of spiced apple flavor and a caramelized top that adds just the right amount of sweetness.
Pro Tips For Making Amazing Apple Cake
- Cream Butter Properly: Use a stand mixer or wooden spoon to beat the butter and sugars until it’s light and fluffy—about 3-4 minutes. I learned this the hard way: skipping this step makes the cake dense. The butter should look like pale yellow clouds, not a sad, clumpy mess. ---
- Use Room-Temp Eggs: Take eggs out of the fridge 30 minutes before mixing—room temperature eggs blend smoother and create a lighter batter. Cold eggs? They’ll fight you, and your cake might turn out gummy. Trust me, this small step makes a real difference. ---
- Don’t Overmix the Batter: Mix the dry ingredients into the wet just until combined—stop as soon as you see no more flour streaks. Overmixing develops gluten, and your cake will turn out tough instead of tender. I’ve ruined cakes this way; you don’t want that. ---
- Bake at 350°F, Not Higher: Stick to the 350°F mark—any hotter, and the outside burns before the center sets. I used to crank the oven to 375°F for speed, but the result was a sad, dry crust. Patience here guarantees a moist, even bake.
Pro cooking tips for great amazing apple cake
Creaming Perfection
For that signature tender crumb, the butter-sugar creaming stage is non-negotiable. Use cold, cubed butter (not melted!) and beat it with sugars on medium speed for 3-4 minutes until it's pale and fluffy. I swear by my KitchenAid stand mixer with the paddle attachment—it creates more air than hand mixers. If your butter melts mid-creaming, chill the bowl for 5 minutes before continuing. The goal is to trap air bubbles that make the cake rise beautifully. 🌟
Apple Prep Secrets
Don’t skip the lemon juice toss—it prevents browning and keeps the apples vibrant. For extra flavor, sauté the apples first in 1 tbsp butter with ½ tsp cinnamon for 5 minutes until just tender (not mushy!). I like using a mix of Honeycrisp and Granny Smith—the sweetness balances the tartness. If your apples are very juicy, pat them dry with a paper towel before folding into batter to avoid a soggy cake.
Baking Time Mastery
Ovens run hot! Start checking for doneness at 40 minutes—the cake is done when a toothpick comes out clean (or with a few moist crumbs). For that caramelized top, sprinkle powdered sugar right before baking. If your cake browns too fast, tent it with foil at 35 minutes and finish uncovered. Pro tip: Bake on the middle rack for even heat distribution. The cake will sink slightly as it cools—that’s normal and delicious! ⏰
Mixing Like a Pro
When combining wet and dry ingredients, mix just until combined—overmixing develops gluten and makes the cake tough. Use a spatula to gently fold in the apples, keeping them mostly submerged but visible. The batter should look thick and slightly lumpy. I always scrape the bowl sides clean to ensure even distribution. For extra moisture, add 1 tbsp sour cream to the dry ingredients before mixing.
Pan Prep Matters
Grease your 8-inch round pan with butter and dust with flour, or line it with parchment paper for easy removal. The pan should be lightly coated—too much grease can make the cake gummy. If using a dark-colored pan, reduce oven temp to 340°F to prevent over-browning. For a streusel topping, mix ½ cup flour, ½ cup brown sugar, and ½ cup cold butter, then sprinkle over the batter before baking.
Cooling for Best Results
Let the cake cool in the pan for 10 minutes—this helps it set before transferring to a wire rack. Patience here prevents cracking! For a glazed finish, drizzle warm cake with ½ cup melted butter + ½ cup powdered sugar while still slightly warm. Store leftovers in an airtight container at room temp for 3 days or refrigerate for 5 days. The flavors deepen overnight, so bake it the night before serving! 💫
Nutrition facts
Frequently asked questions
Can I use frozen apples instead of fresh?
Thaw frozen apples completely first, then pat them completely dry with paper towels to prevent excess moisture in your cake. For best results, use a mix of ½ cup thawed applesauce (unsweetened) plus 3 cups fresh apple slices to maintain texture. Avoid using frozen apples straight from the freezer—they'll make your cake soggy.
How do I make this cake vegan?
Swap the butter for 1 cup vegan butter or coconut oil, use flax eggs (2 tbsp ground flaxseed + 6 tbsp water per egg), and replace regular milk with almond or oat milk. For the caramelized top, use powdered sugar + 1 tsp coconut oil sprinkled on top. The texture stays moist, but vegan cakes often have slightly denser crumb.
Why did my cake sink in the middle?
This usually happens from overmixing or opening the oven door too early. Check your oven temperature with an oven thermometer—many run hotter than set. Also ensure you're using fresh baking powder (test by mixing 1 tsp with water—it should bubble). Let the cake cool completely in the pan for 15 minutes before transferring to avoid structural collapse.
Can I make this cake gluten-free?
Yes! Replace the all-purpose flour with a 1:1 gluten-free baking flour blend (like Bob's Red Mill) and add ½ tsp xanthan gum to the dry ingredients. You may need to increase the baking time by 5-10 minutes as gluten-free cakes often bake slower. For best results, use a gluten-free measuring cup to avoid packing the flour too tightly.
What's the best way to store leftovers?
Wrap cooled cake tightly in plastic wrap or store in an airtight container at room temperature for 3-4 days. For longer storage, refrigerate for up to 1 week or freeze for 3 months. To reheat, microwave for 10-15 seconds or warm at 300°F for 5 minutes—just until the filling is heated through. The cake actually tastes better the second day!